When we moved into our house in January I immediately knew the wall between the kitchen and dining room had to go. It wasn’t high on the priorities list but as a person who loves to host others, I knew there was no way I could fit a large table in a small dining room, and I desperately want a large table in my dining room!
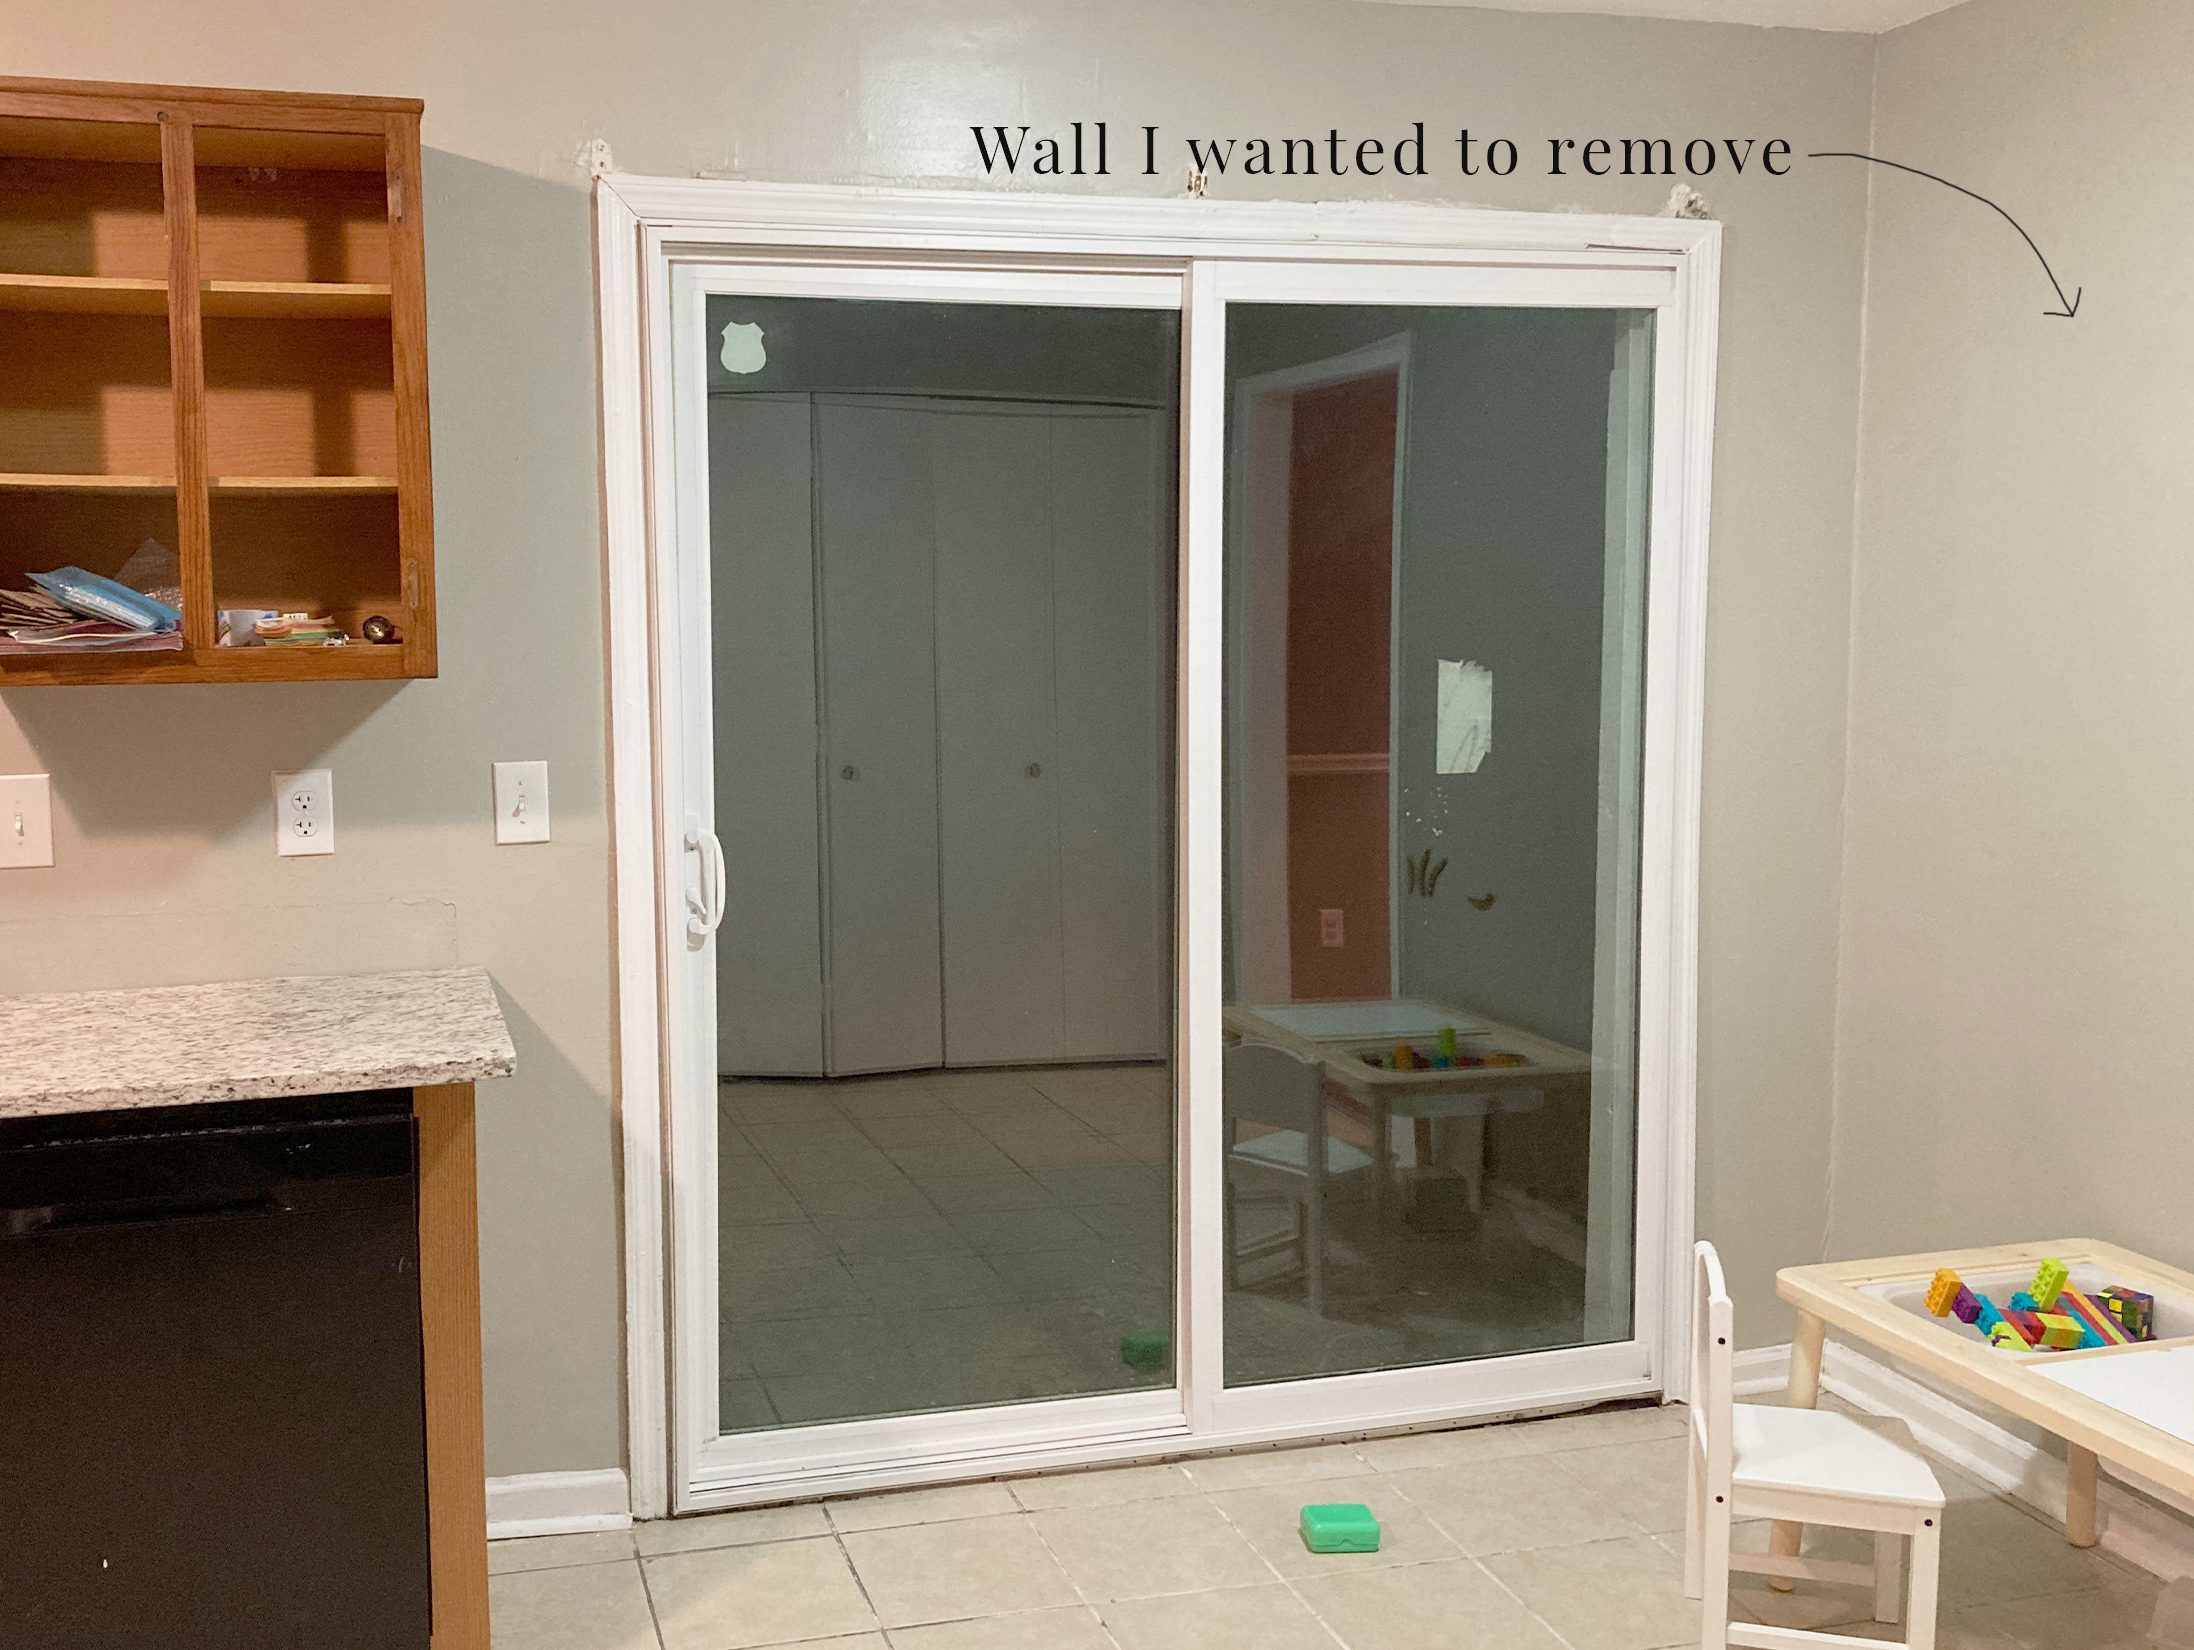
As luck has it, the wall is load bearing, contains plumbing AND of course electrical. I was quoted at $8k to remove the wall. Yikes! Well, that’s not happening any time soon (or maybe not ever). So I had to find some ways to make this wall more attractive so that it would not remind me on a daily basis that I can’t have a huge table there instead.
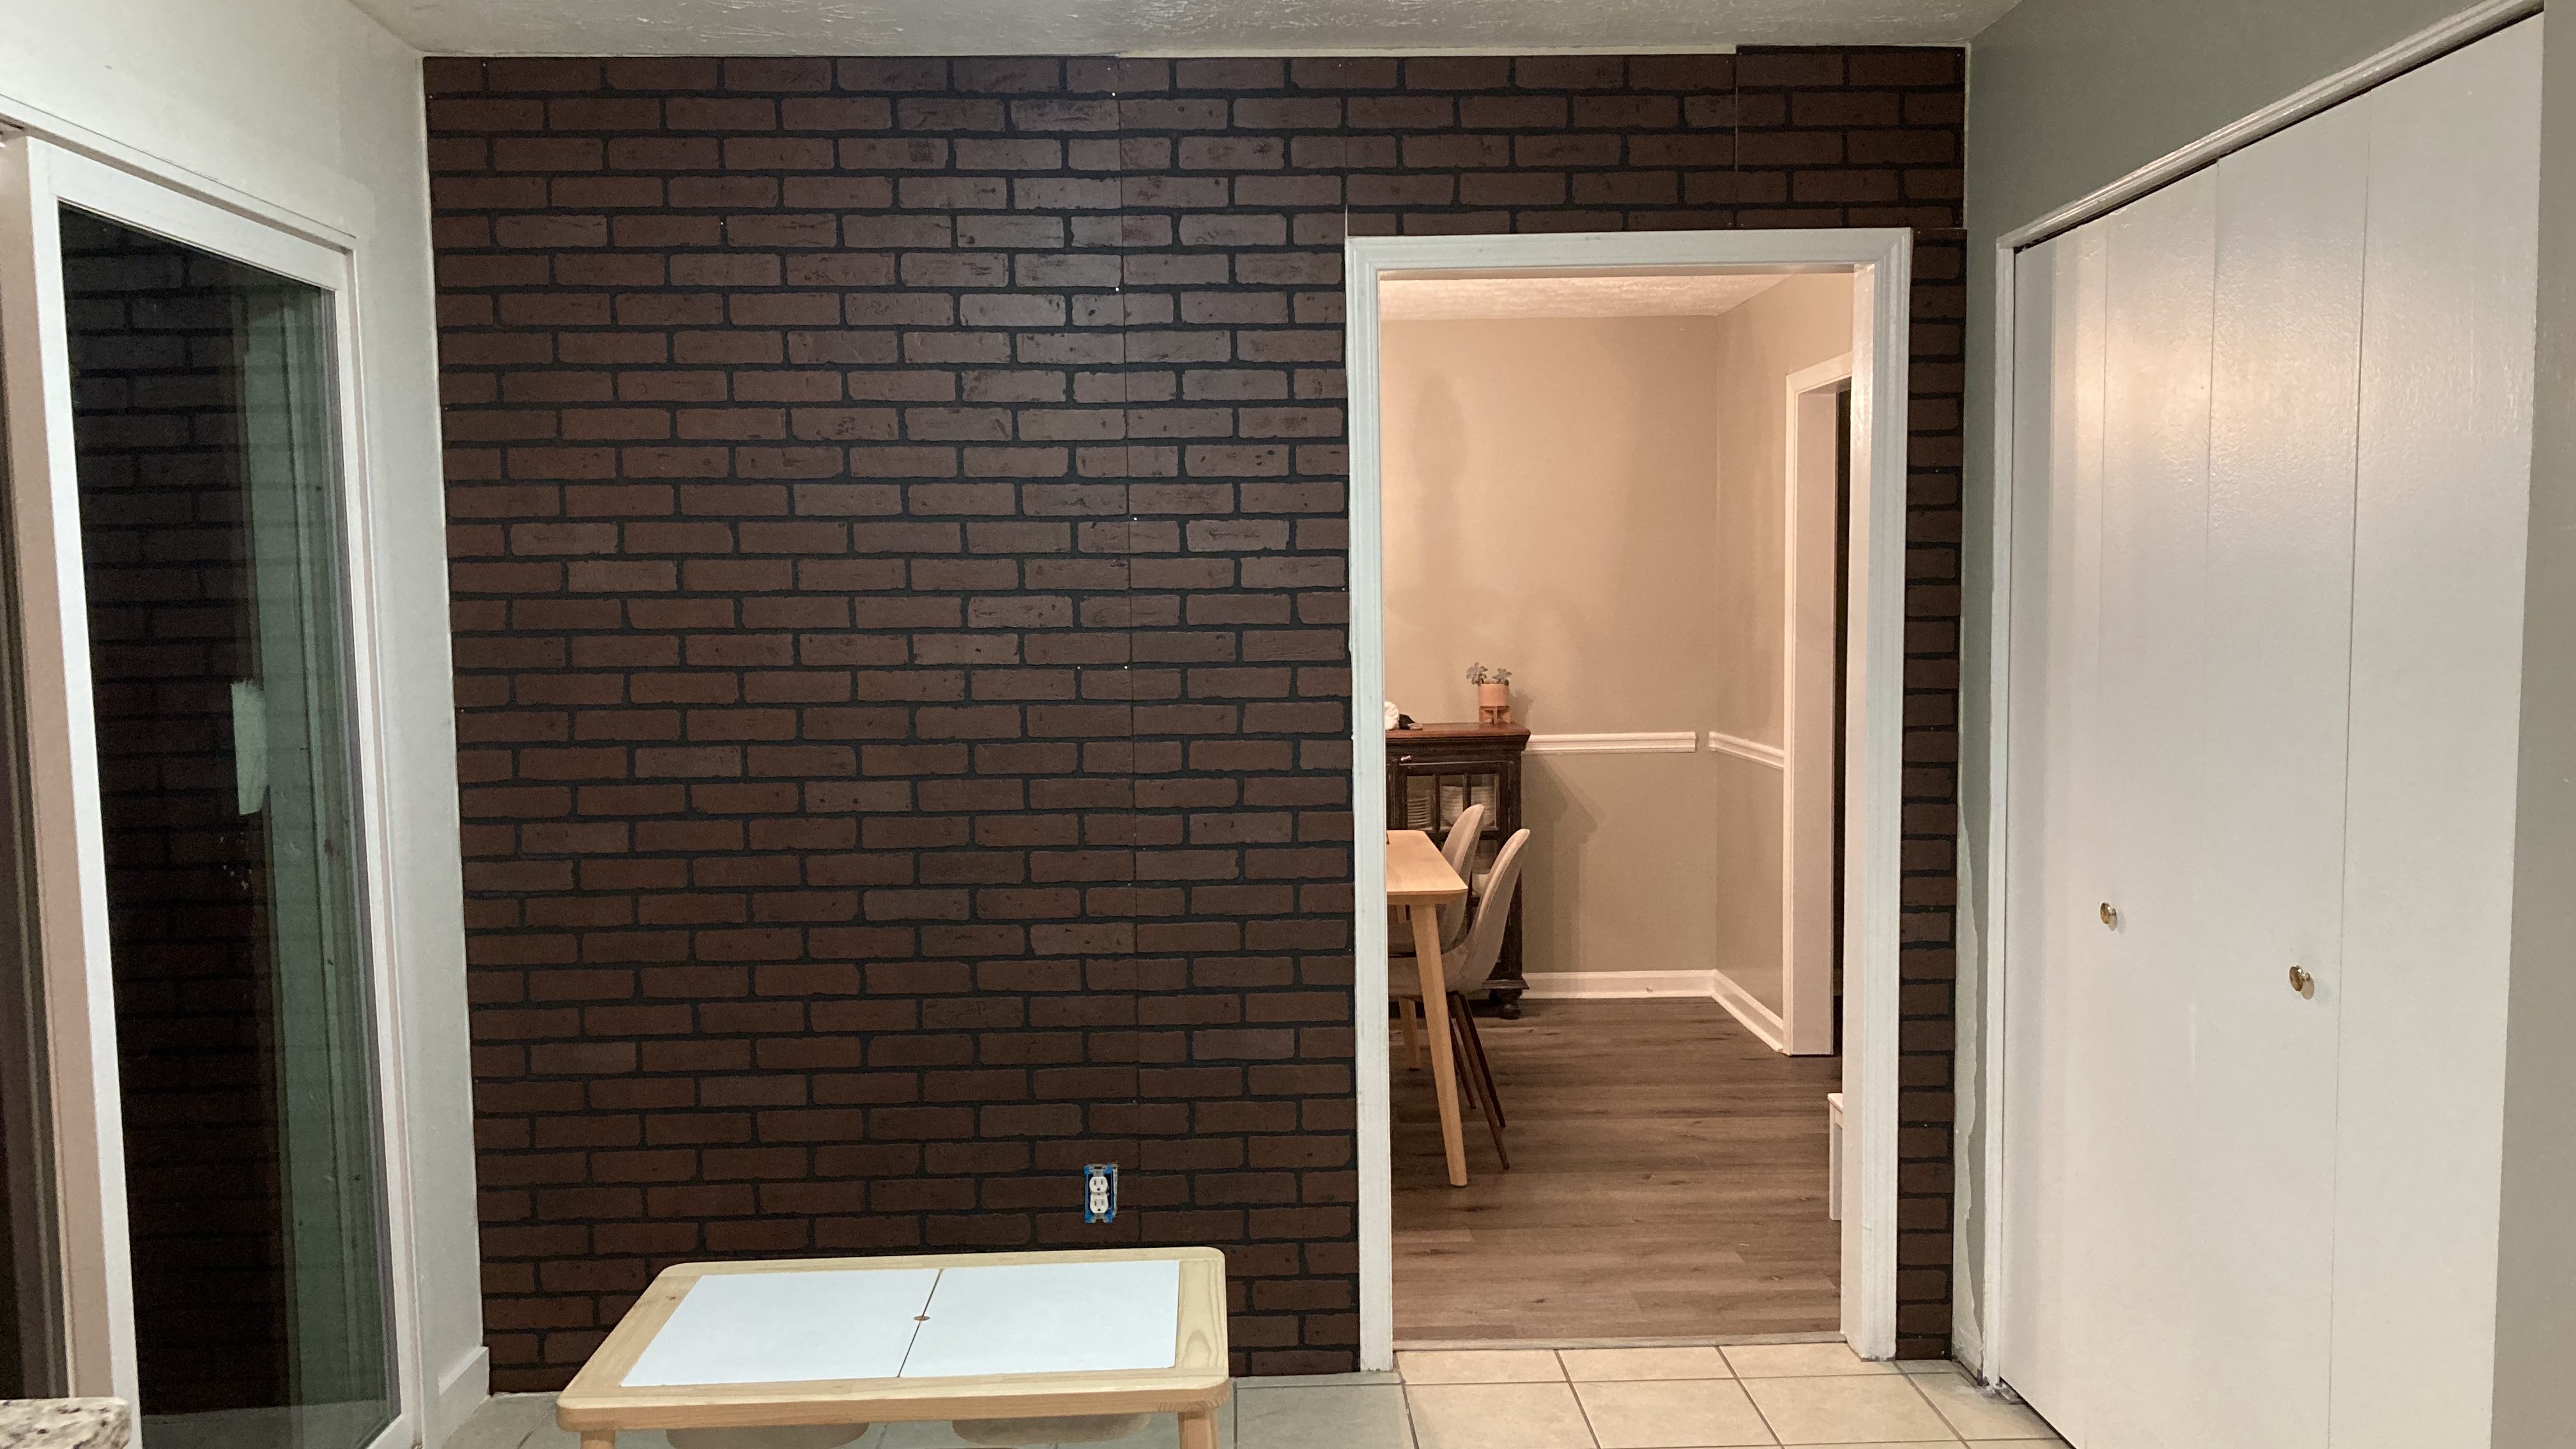
Through one of my rabbit trail internet searches I came across folks who created faux brick walls as both accent walls as well as an alternative to tile for a kitchen backsplash. Since I have brick on the exterior of the house, it seemed like a great idea to bring this into my home to give the kitchen some character and interest while keeping a cohesive look. I also wanted something that could be easily removed in case I do decide to take out the wall at some point in time. Going faux was the best route for me.
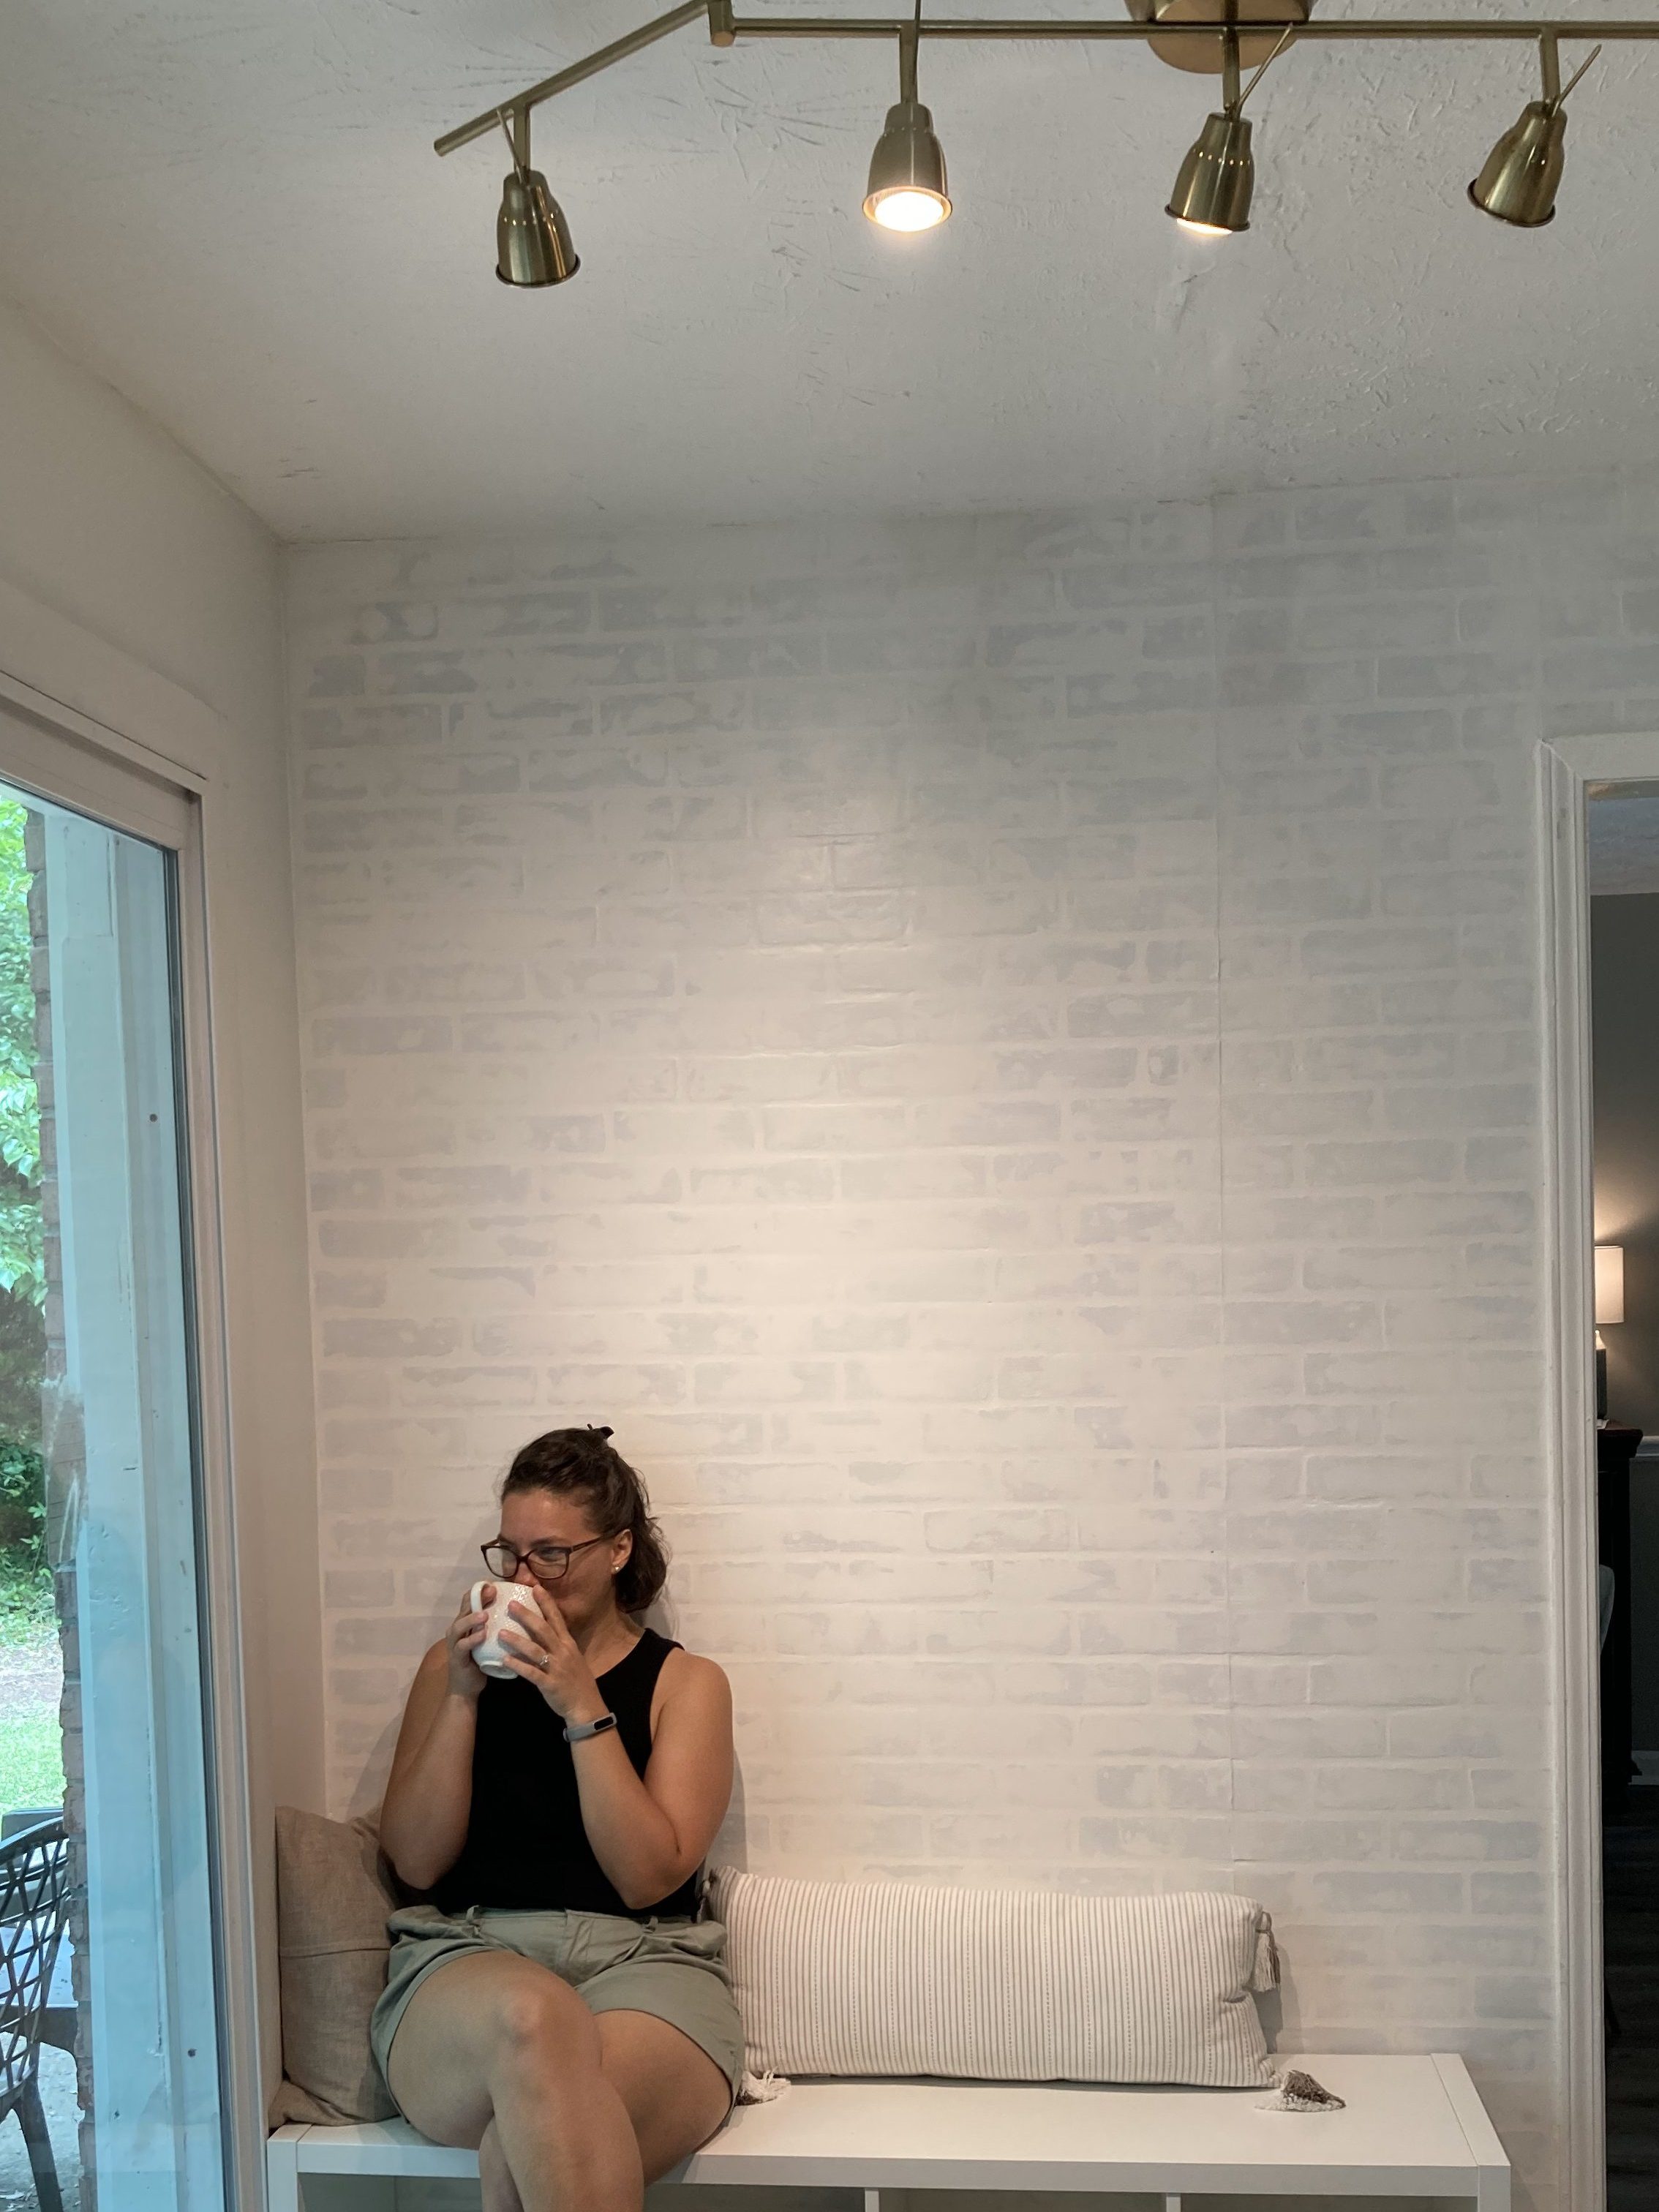
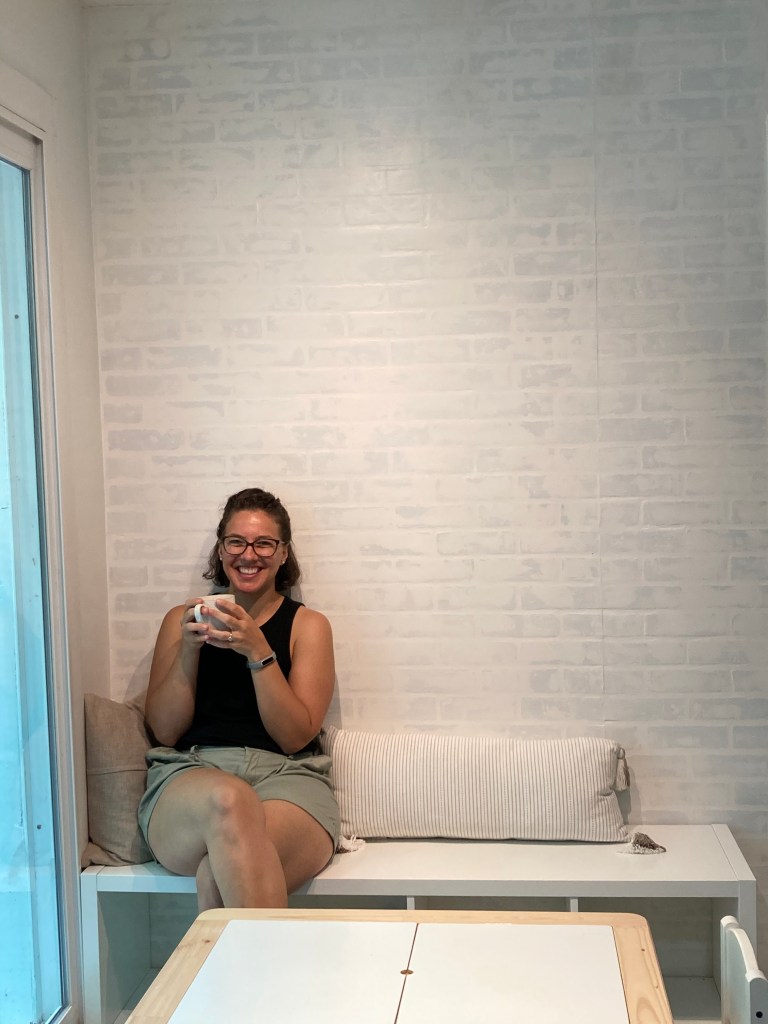
The result is NIGHT AND DAY! What a difference! While I would still prefer a large table and no wall, I am VERY happy with the end result and find this little space perfect for my family’s needs. I can sit and view wildlife out in my backyard through the sliders and my two year old has a dedicated space for play. Check out the result below and just keep on scrolling if you’re interested in the how to! If you have a design dilemma, check out out my services page!

DIY Faux Brick Wall
What you’ll need
- 4 x 8 ft brick panels
- Liquid nails/construction adhesive
- Joint Compound
- Paint – I used Clare Paint, color: whipped (if you haven’t used clare, you’re missing out!)
- Nails (I just used whatever I could find)
- Paint brush
- Large Putty Knife
- Outlet extenders (if your wall contains outlets or switches)
How to do it
- Measure. Decide how much wall you are covering by measuring your wall and decide ahead of time how you will piece together the 4 x 8 ft sheets. I had a walkway in mine, so I had to cut up a few small pieces from a large sheet. Deciding this ahead of time was helpful for me.
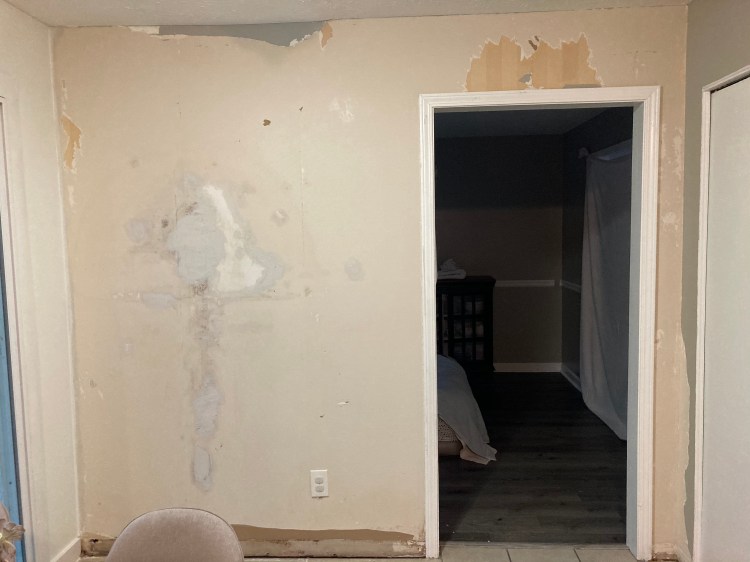
- Prep your wall. Make sure your wall if free of debris so that when you use your adhesive you get a good bond. Also, turn off the breaker to this part of your home and remove the covers of your outlets and unscrew the outlets. You don’t need to remove them completely, but I found it helpful to have them out of the way.

Cut and Secure to the wall. Decide where you will put the panels. I had one large one that needed to be trimmed on top so I started with that one first. Then I secured that one to the wall with construction adhesive and a few nails before measuring and cutting the next piece. I followed the same pattern: measure, cut, then secure in order to make sure my piece would fit perfectly.
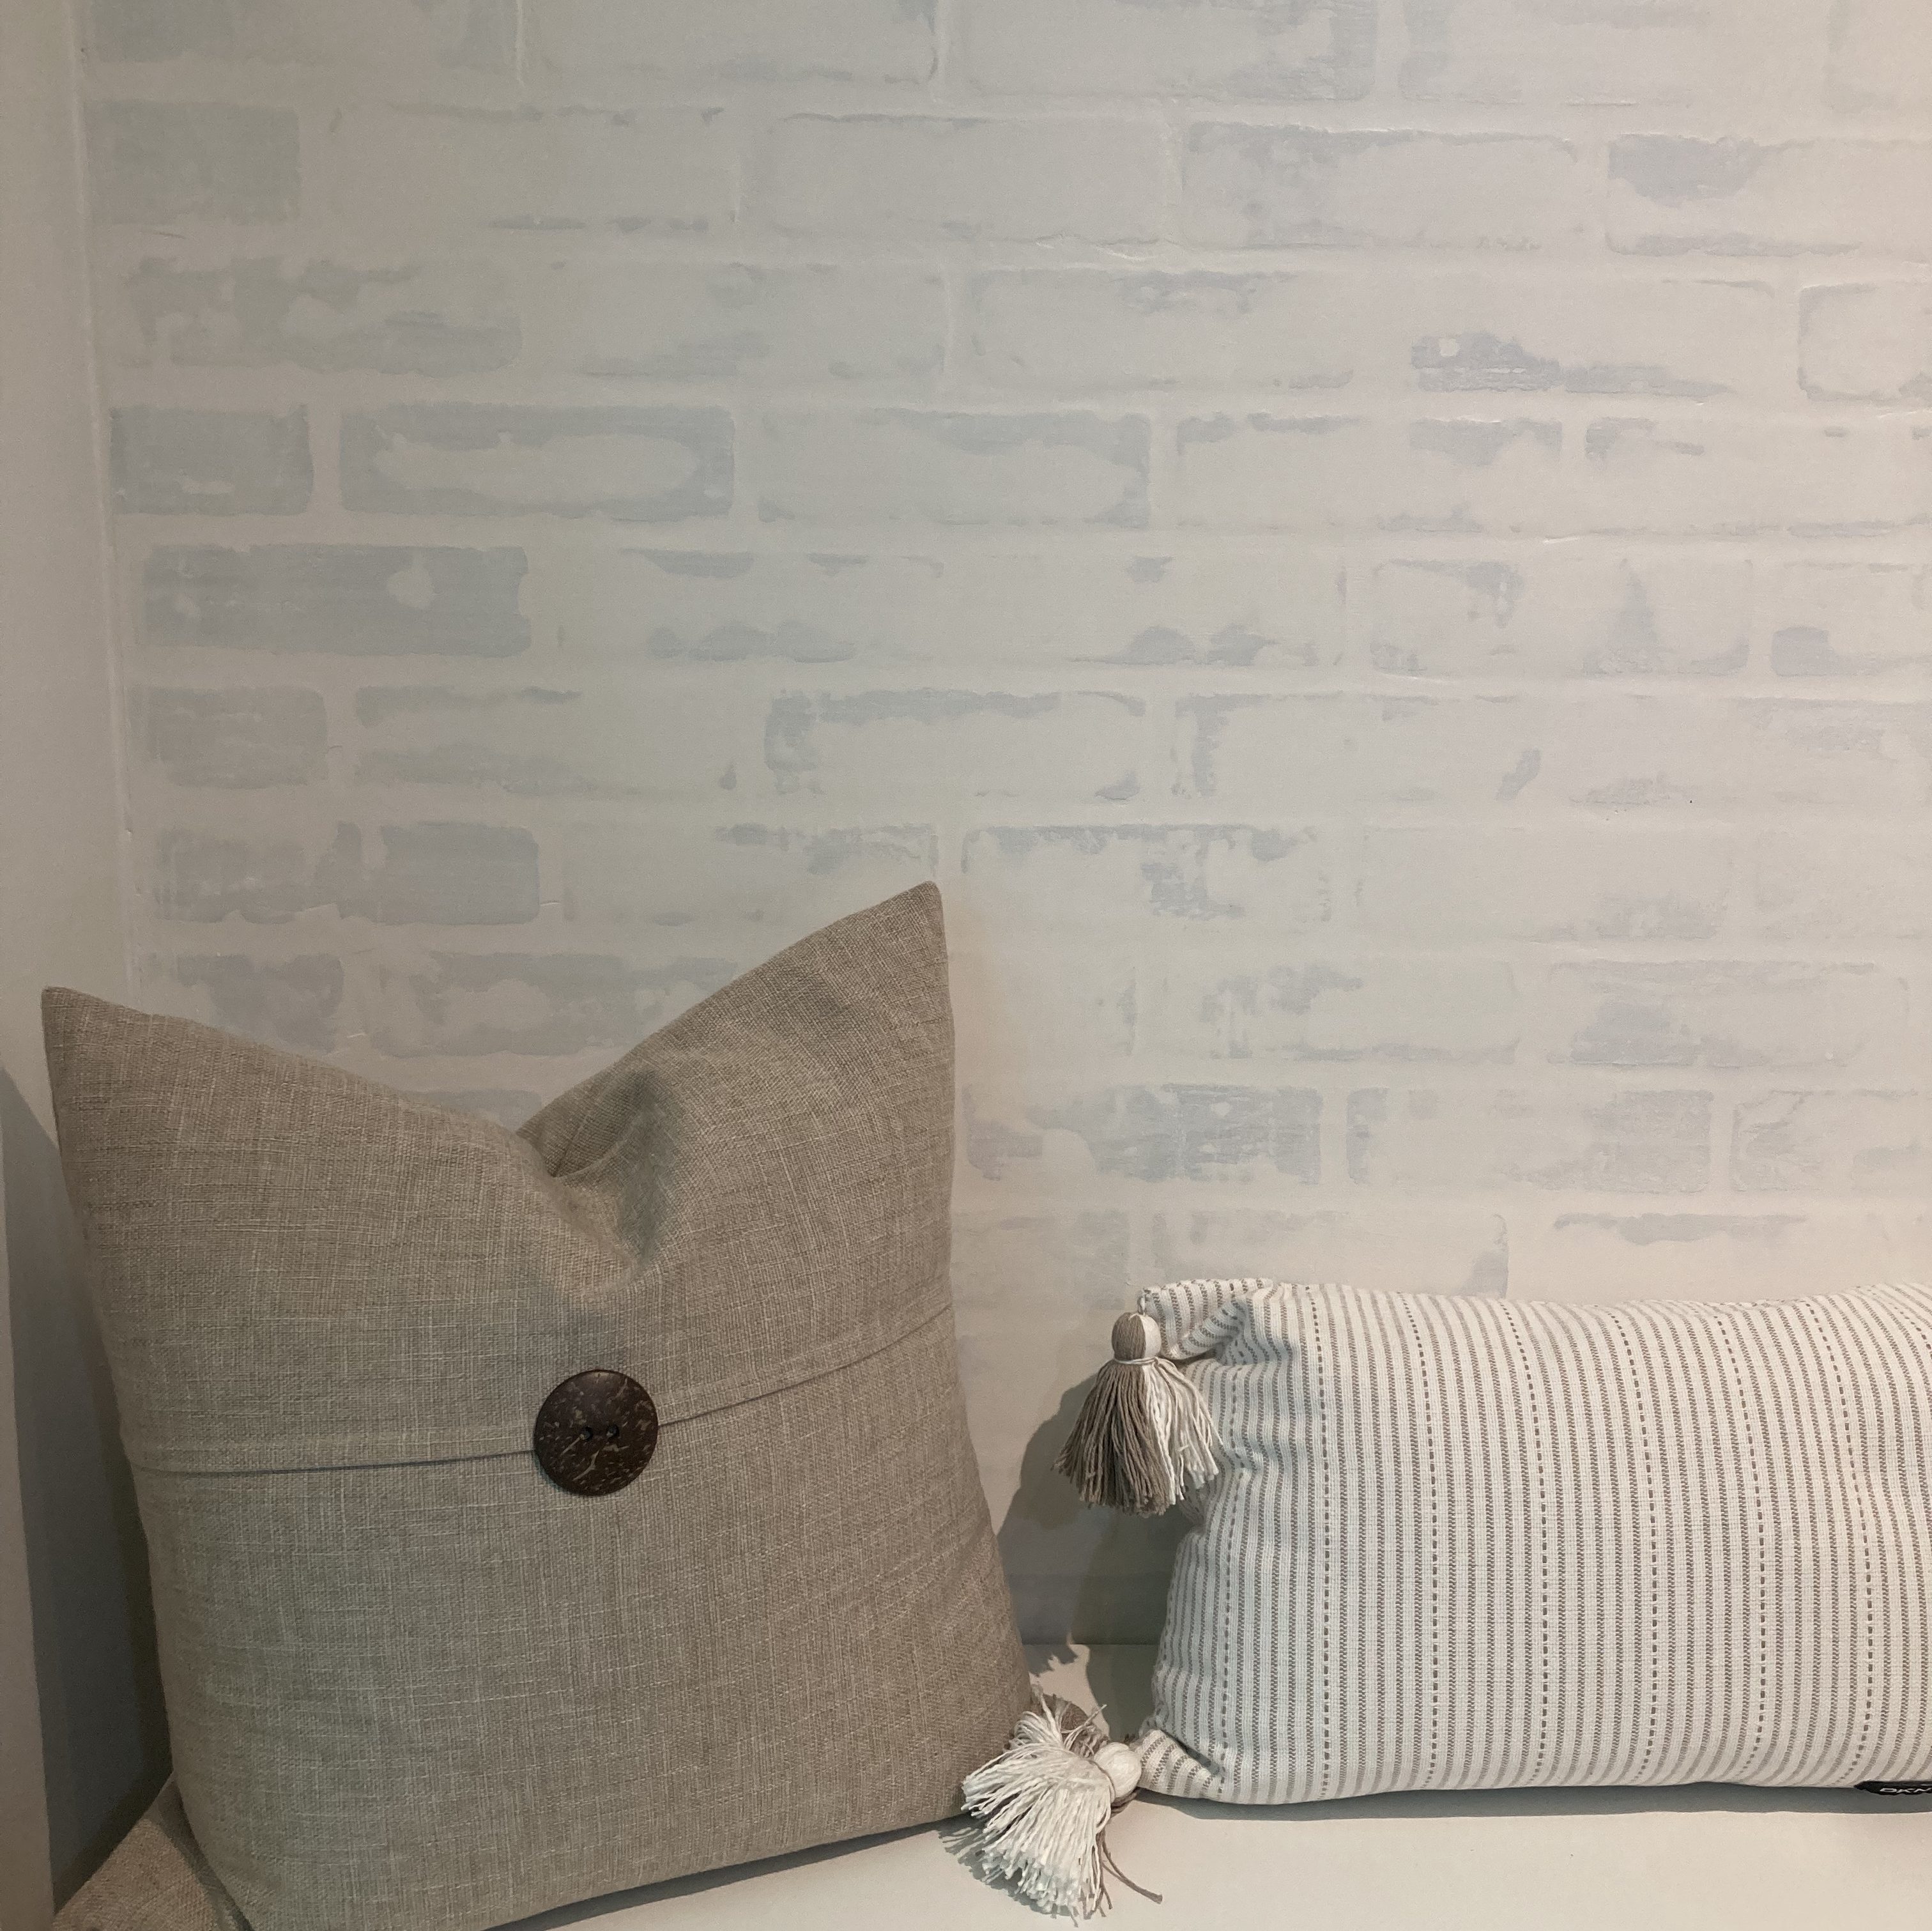
- Apply joint compound. I almost left this part out… DO NOT LEAVE THIS PART OUT! Since I wanted to white wash the wall and give it a German shmear sort of technique, the joint compound helps to create that aged finish. Use the joint compound to fill in all the gaps and give the wall a bit of a smoother finish. Its a little tricky at first to know how much to put but the compound is forgiving. If you put too much, you can use a wet rag to wipe some off. This part is about finding the look you want.
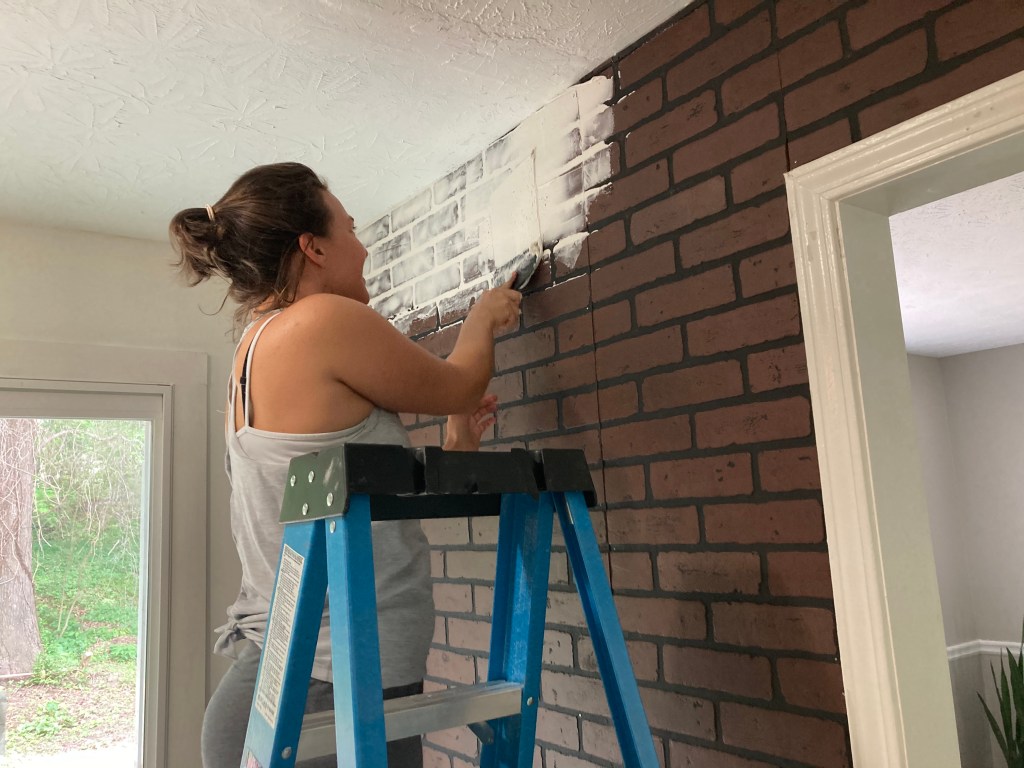
- Paint. Give your joint compound some time to dry (exact time depends on specific compound). I just left mine to dry overnight. If you want a white washed look, you can make your mixture using 50% paint and 50% water. You do not need a lot of this, I actually made too much so I’m trying to figure out what else I can white wash around the house (I see you stone hearth!). Start with a smaller batch, you can always make more. While most everyone recommends a 50/50 mixture for white wash, I found it to be too opaque and ended up adding some more paint. I did four coats of this on my wall because the joint compound really soaked it up. Don’t skip this step either because the joint compound needs to be sealed.
- Add outlet extenders. If you had an outlet in your wall, now is the time to add your outlet extenders. Follow the instructions that come with the extenders and your outlets will now sit even with the brick panel. If you skip this step, I promise you’ll regret it. The outlet covers won’t fit well over the outlets and your new wall will look really funny.
- Capture. Enjoy your new brick wall and capture the moment! Post on instagram and tag @hellohopdesign. I want to see your handiwork!