I love cooking, baking and just experimenting in the kitchen. There is nothing more frustrating to a “make-from-scratch” home cook than limited countertop space. Where am I supposed to knead bread dough when I have a produce stand on my countertop?
During the past eight years of renting in Miami, I have had to succumb to cooking in small kitchens, many of which could only fit one person at a time. But I have always made it work, so I really can’t complain. Now that I am in the townhouse, I have been grateful to have a substantially larger kitchen (comparatively speaking), allowing my husband to wash the dishes, while bake and make more dirty dishes. It’s a great set up!
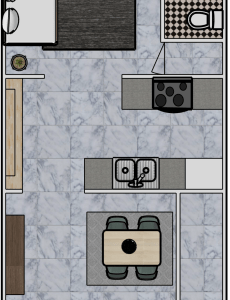
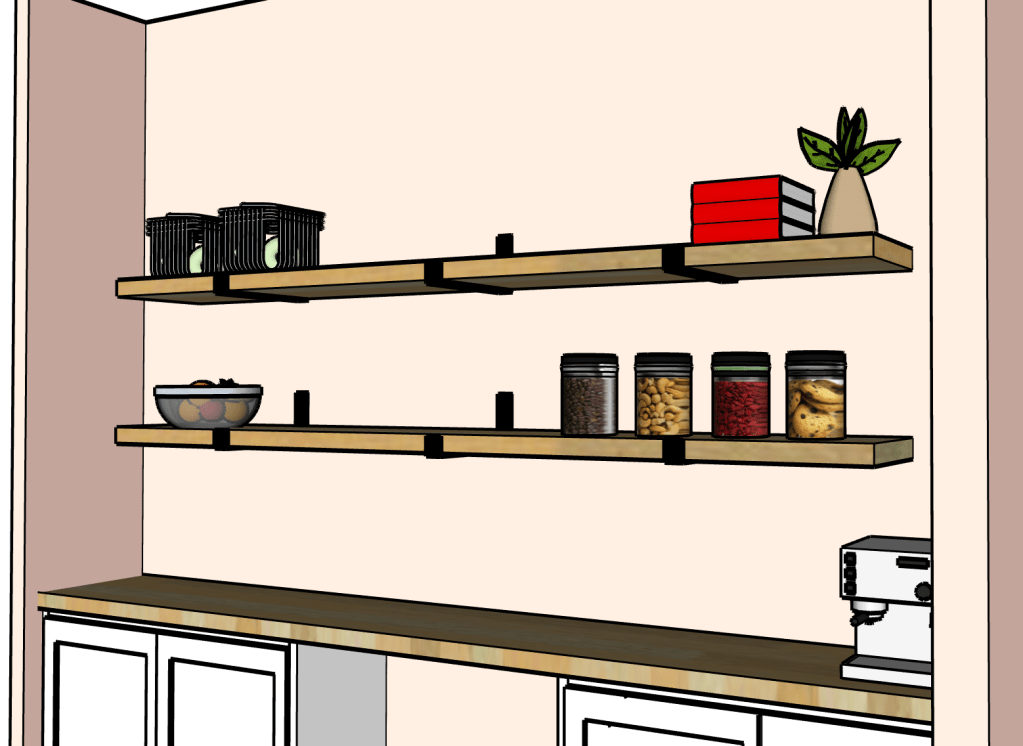
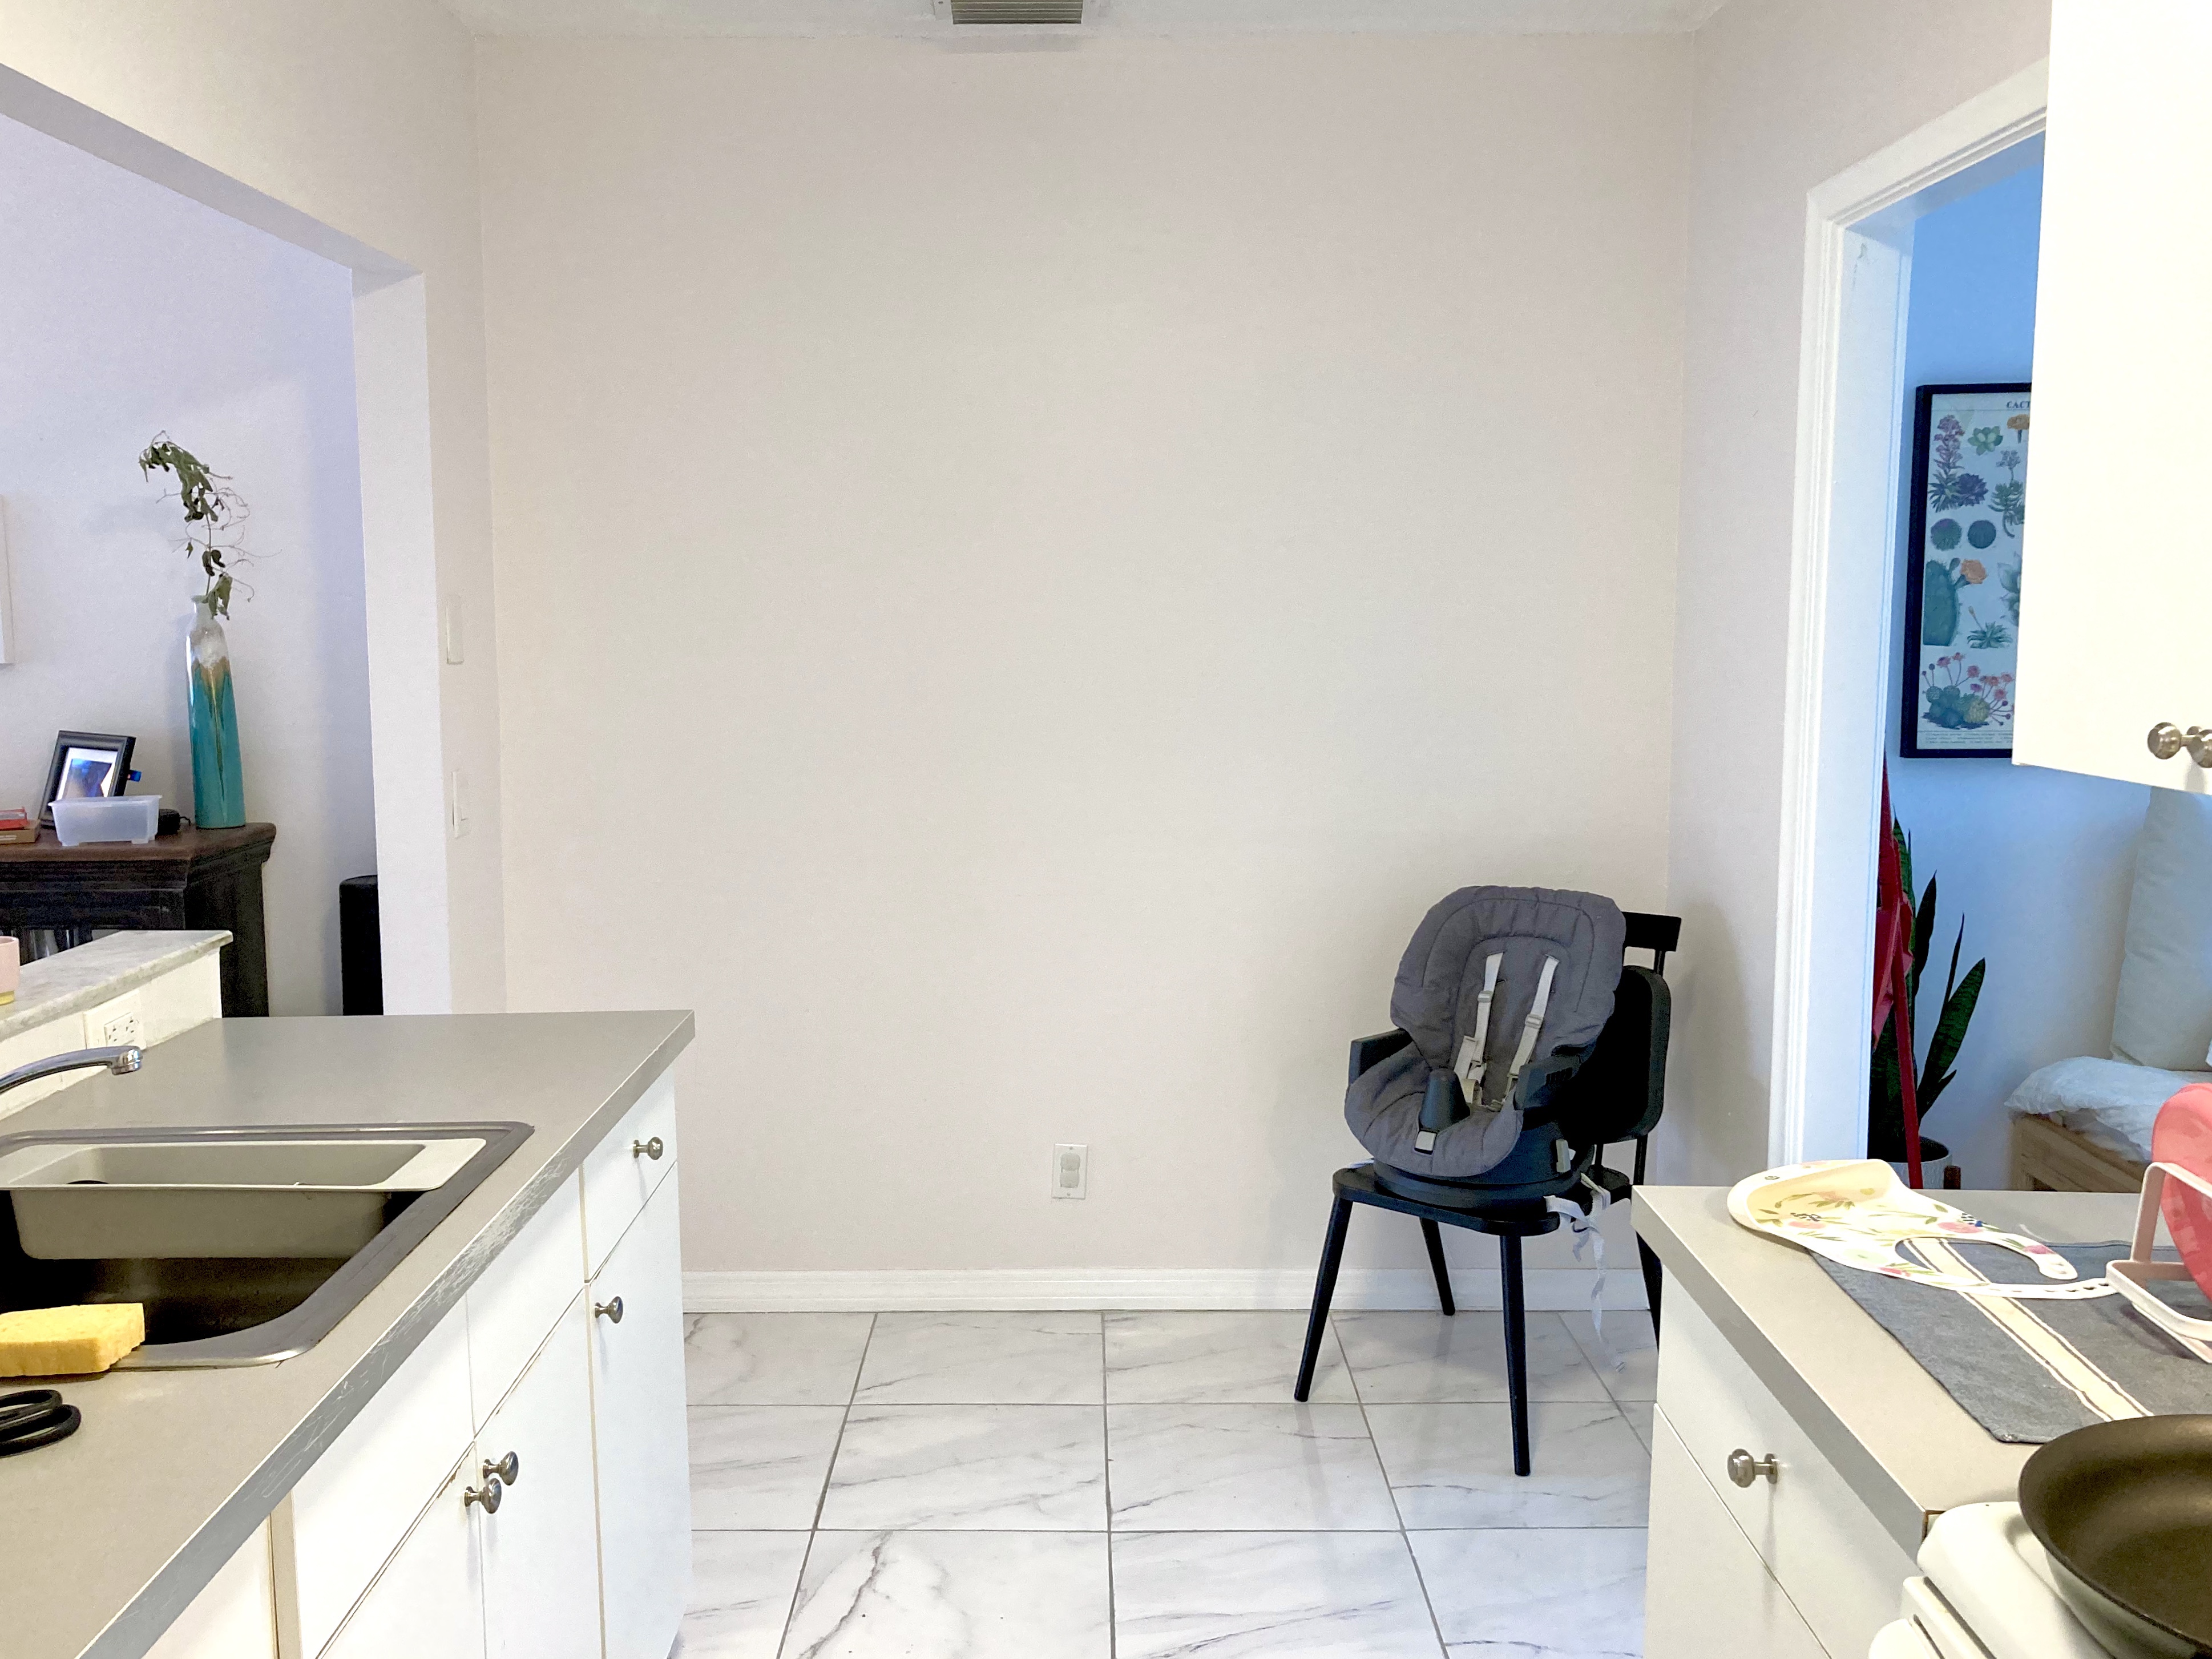
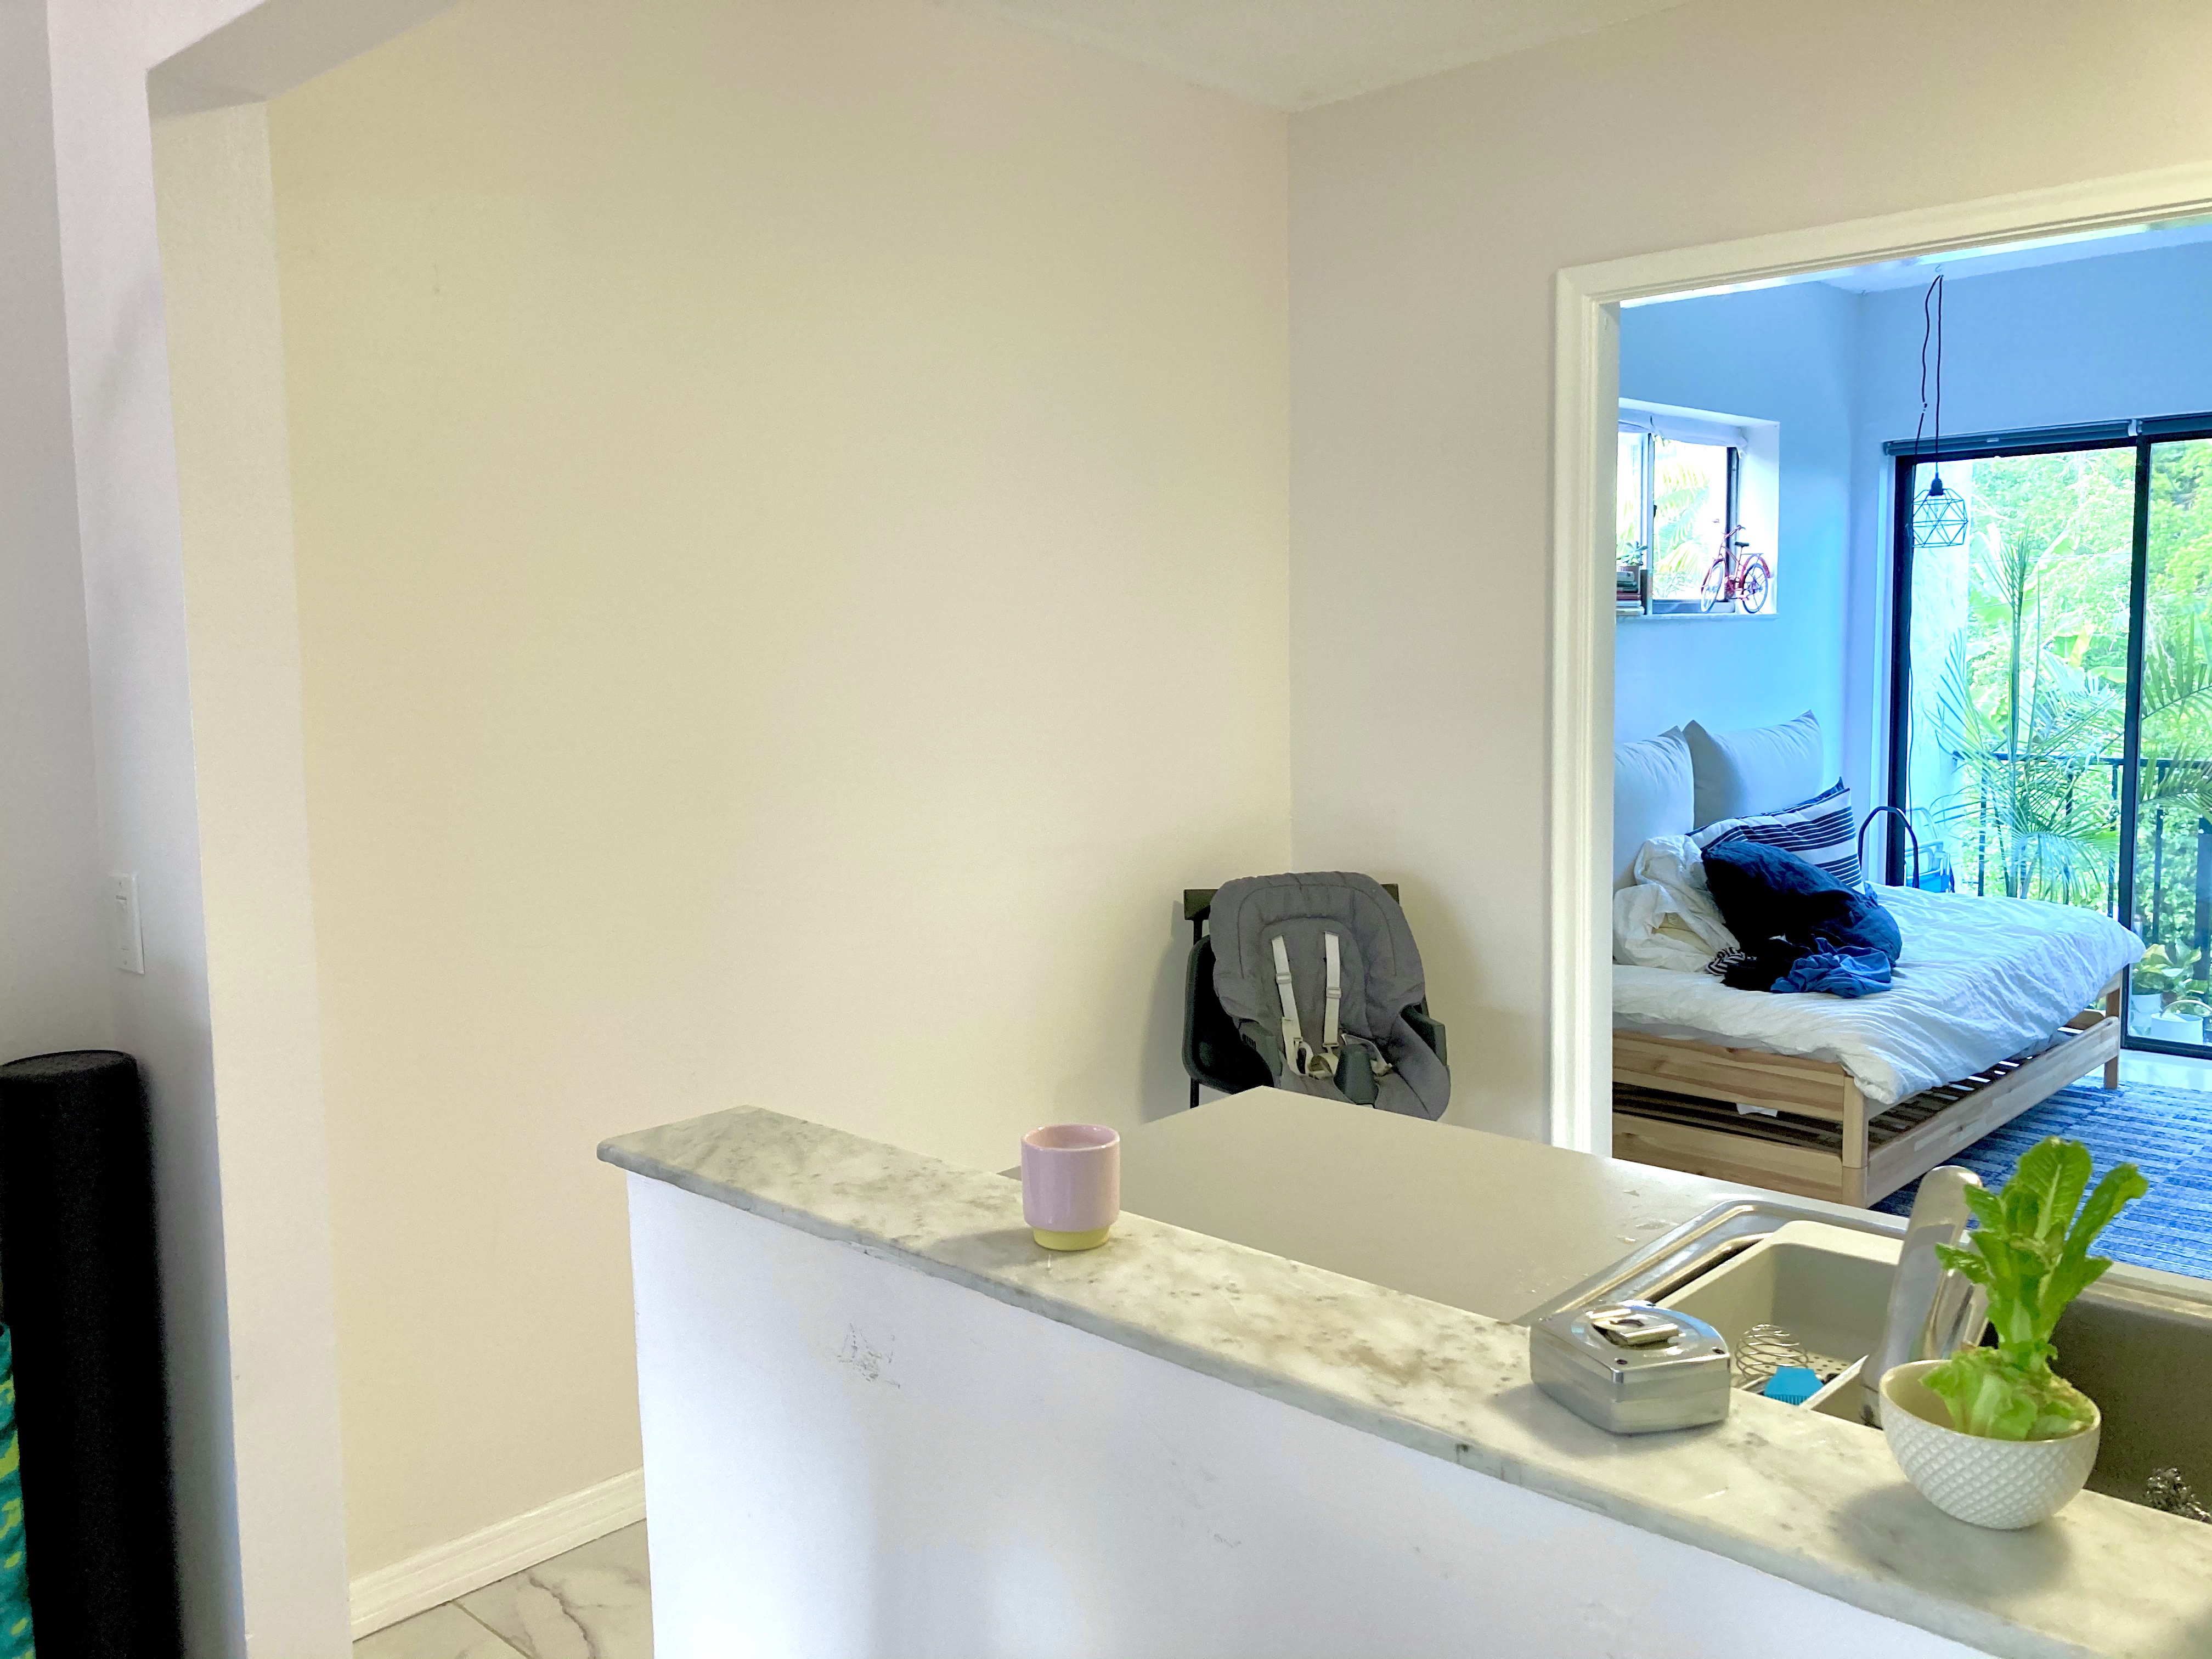
When we moved in, there was a large empty wall on one end of the kitchen, which had me scratching my head trying to figure out how the space was intended to be used. It is too big for it to just be empty, and too small to fit a table or standard countertop since it is also the walkway into the den. After staring at this wall for months, I knew what was needed. My idea was to add more countertop space, storage underneath and open shelving on the wall. Check out the layout of the kitchen and the 3D model of the vision.

Before:
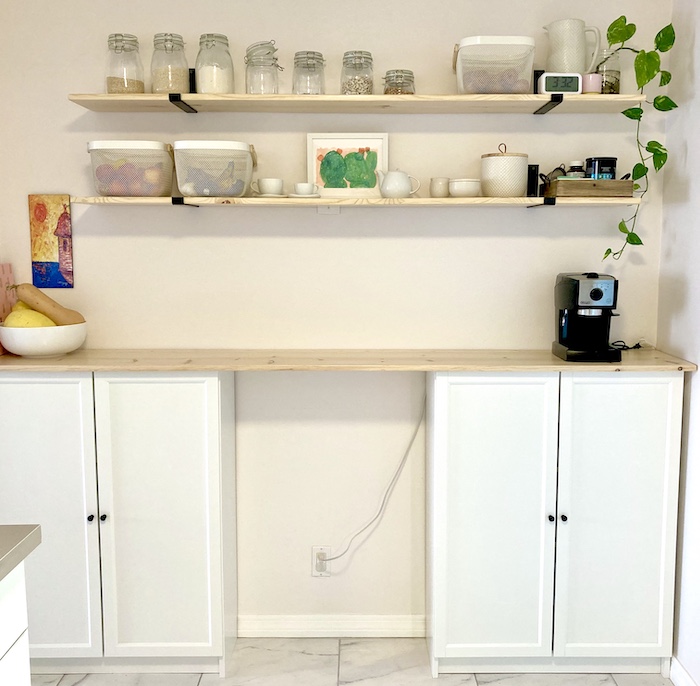
After:
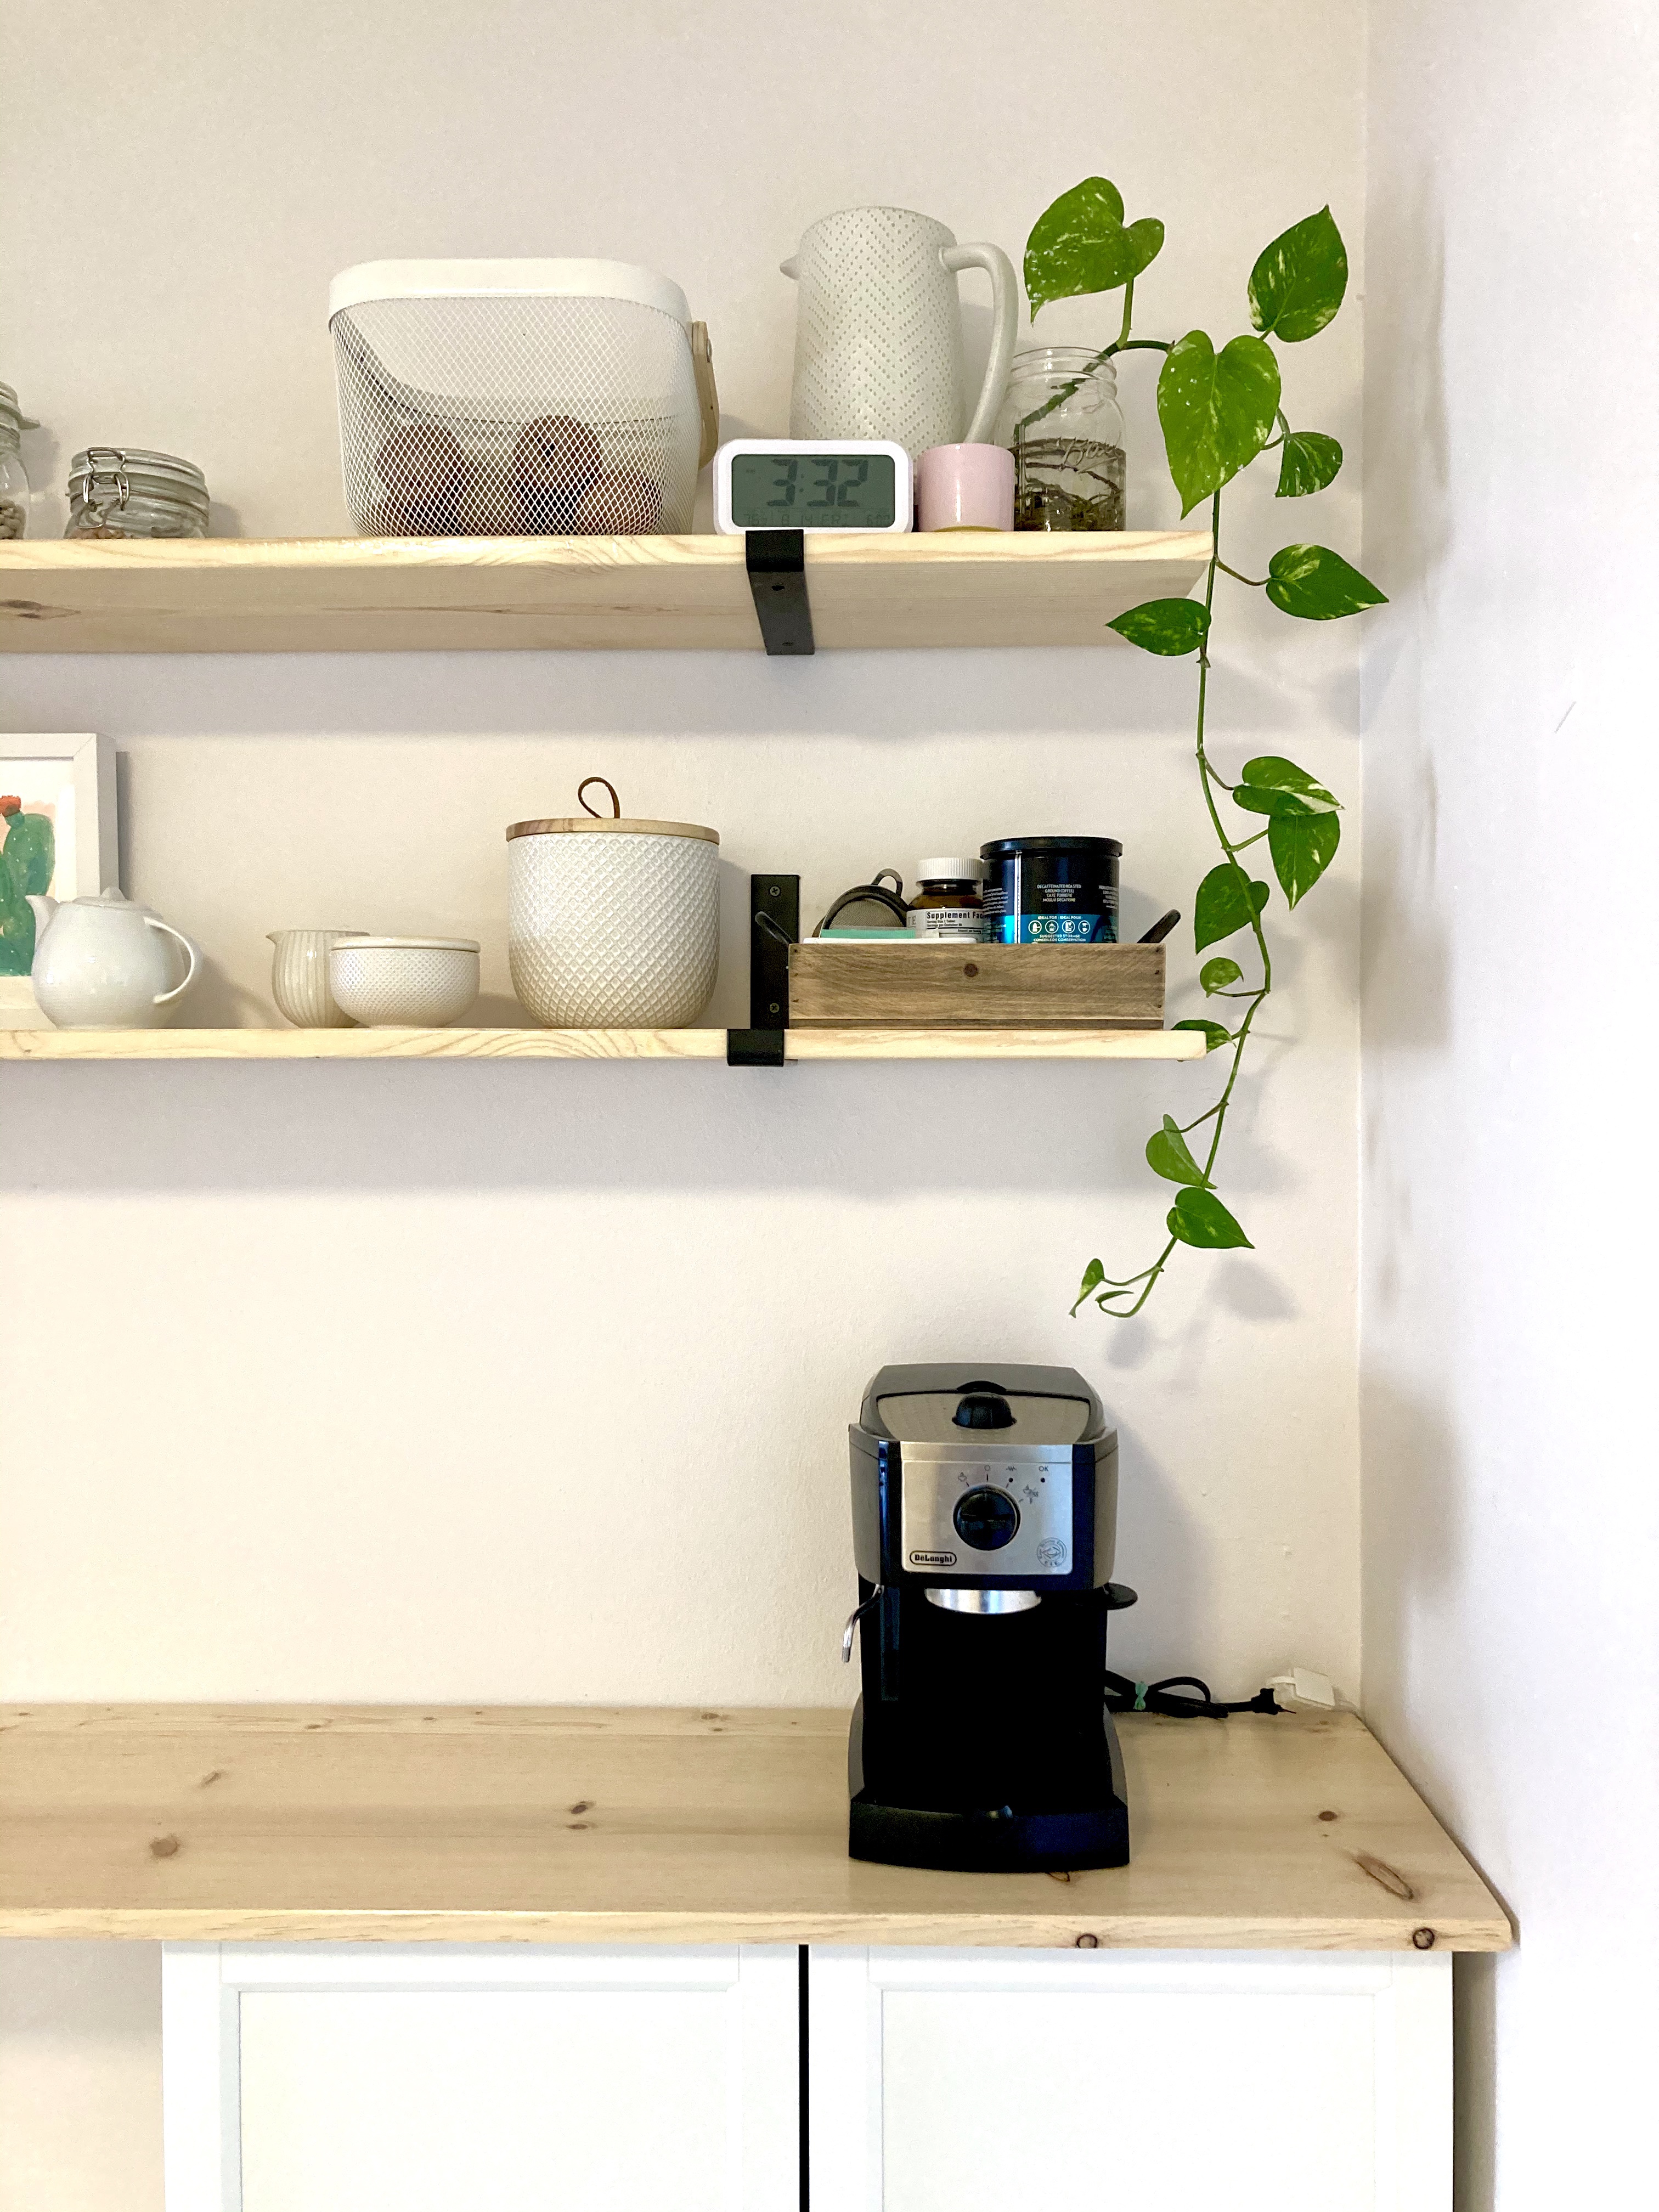

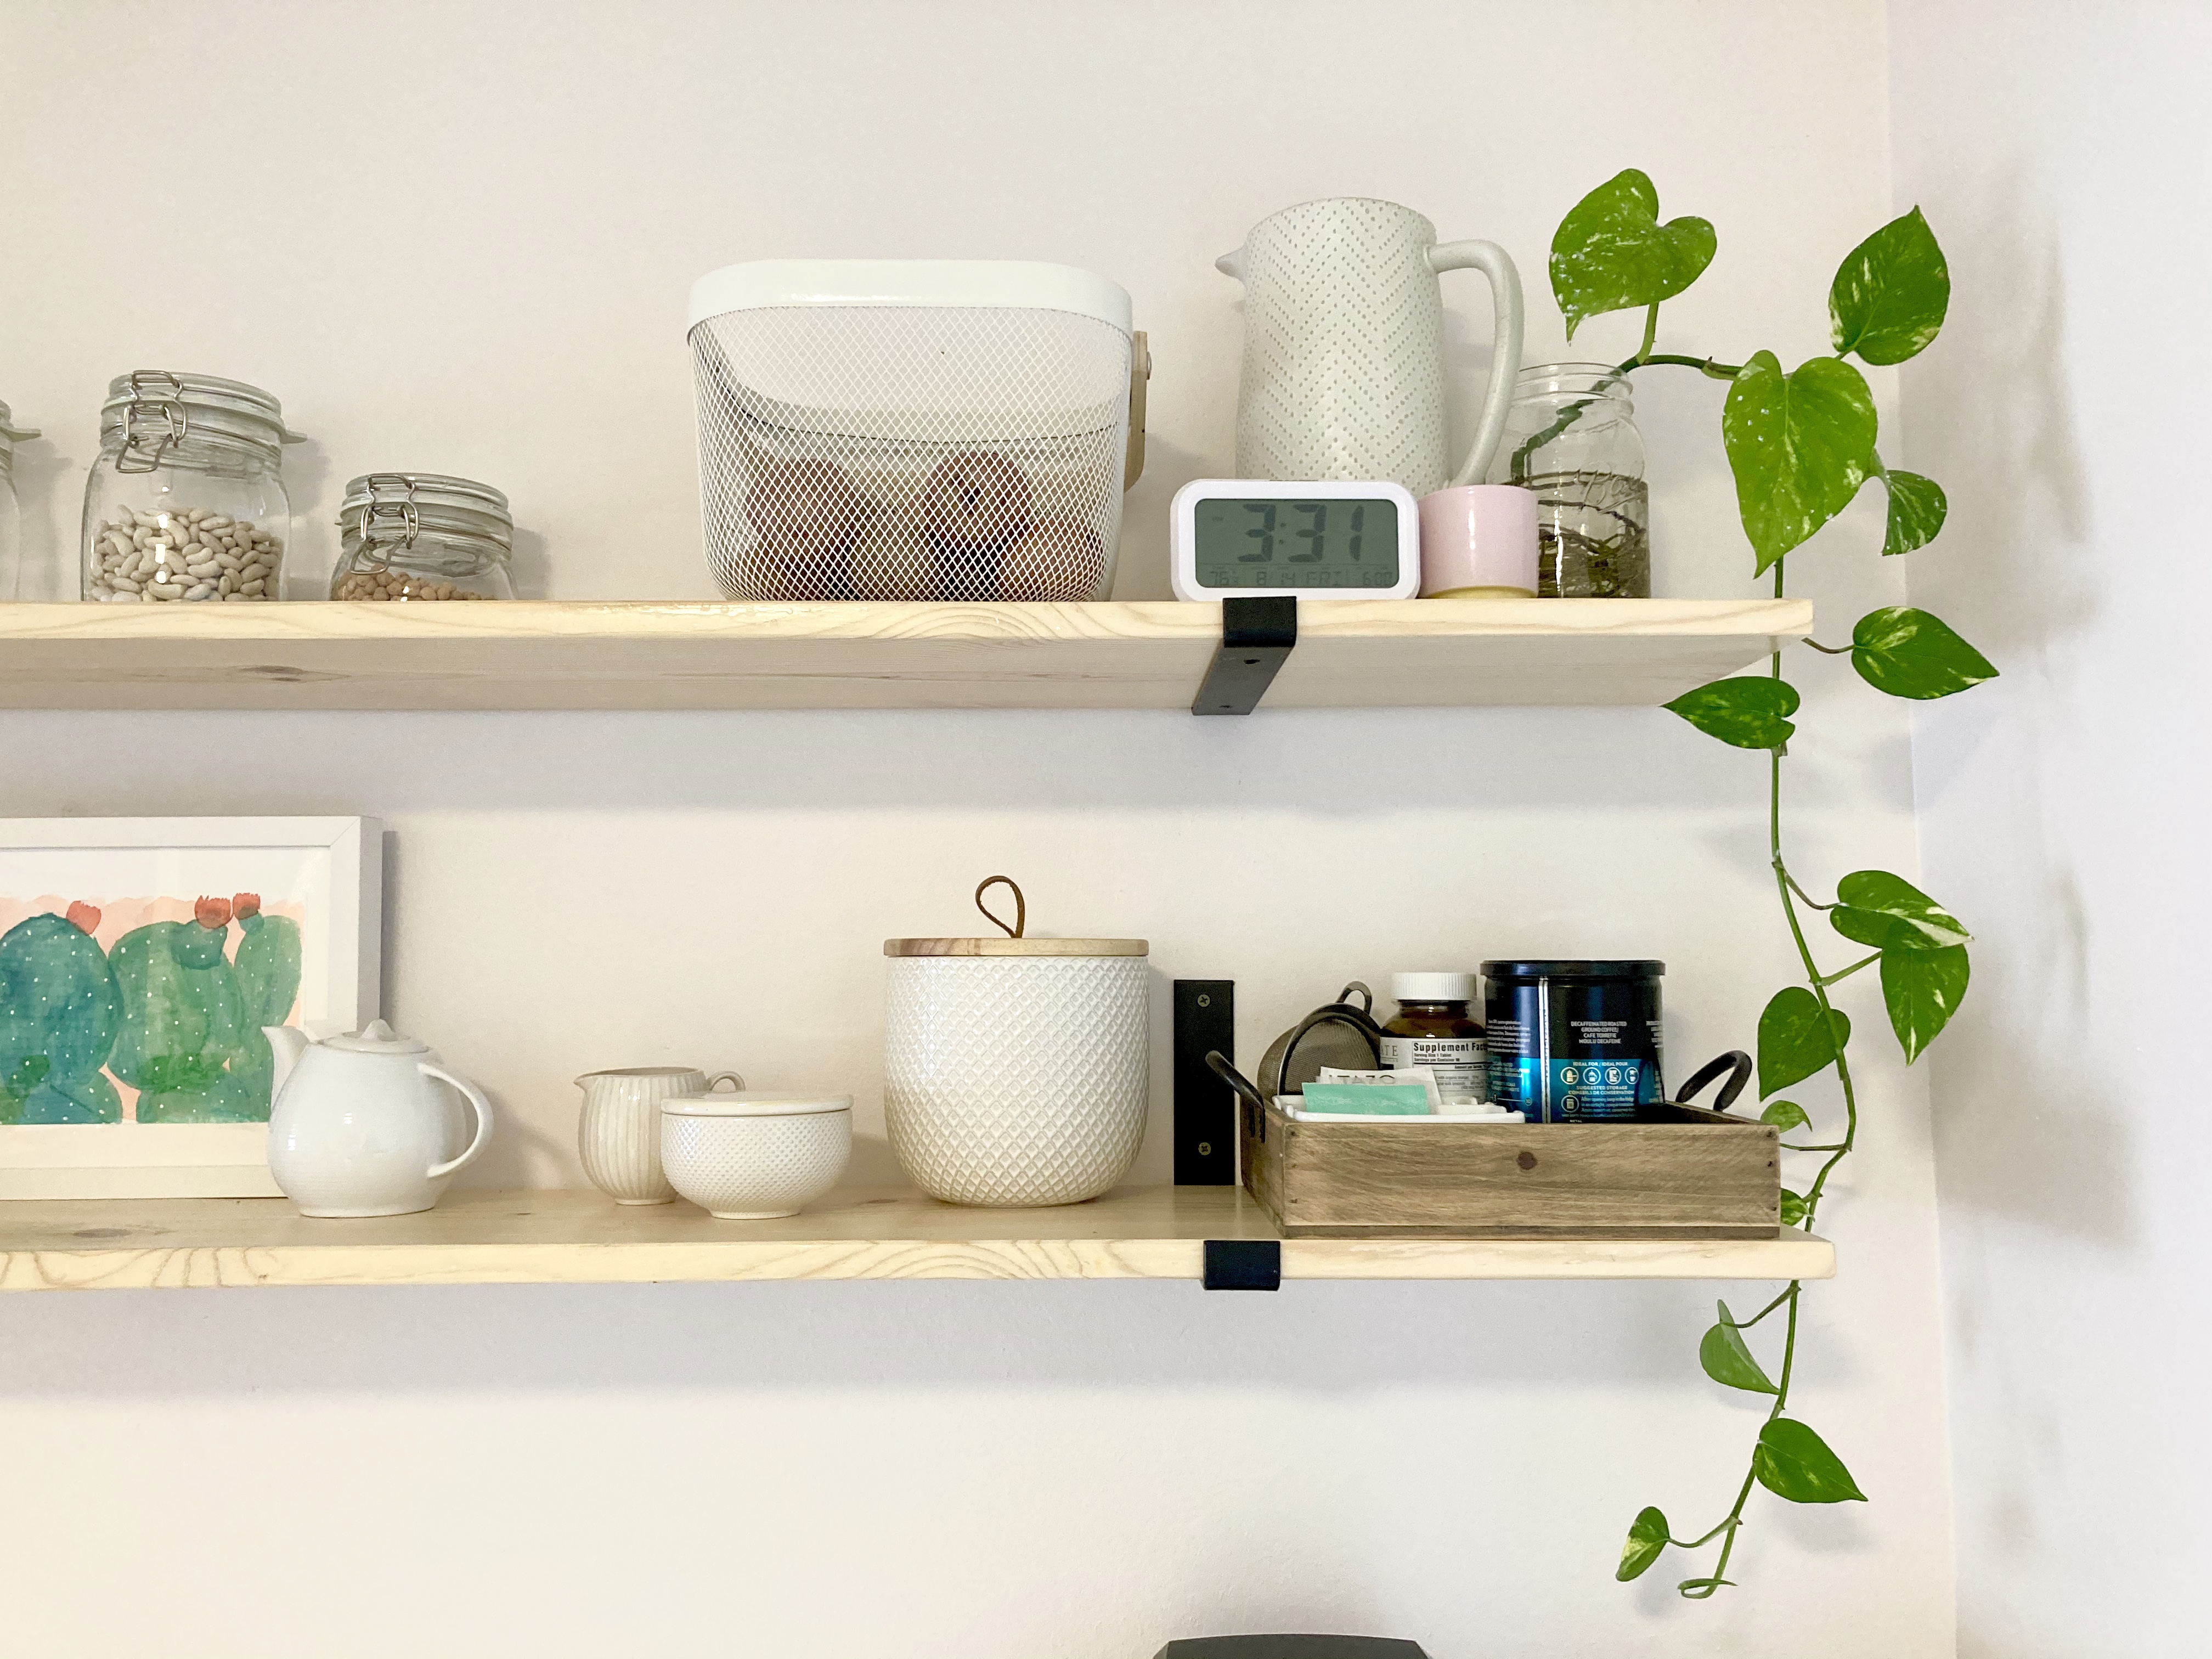

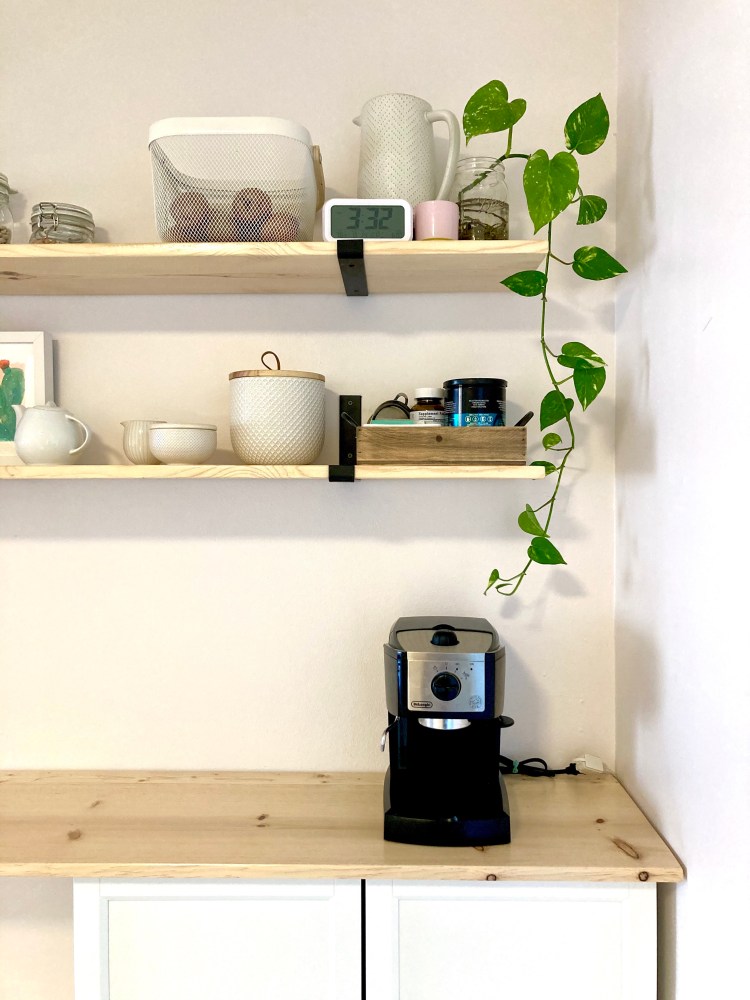
This project required a bit more labor than my other projects since I built the shelves and the countertop myself. I bought two 1 x 6 x 10 foot pine boards from Home Depot to construct the shelves. I did not need to do any cuts on these, but I did sand them down a fair amount with a power sander before applying three coats of polycrylic. I prefer the look of a floating shelf, but that is quite a bit more work to DIY and I didn’t want to pay to have it done. I resorted to these minimalistic J-shelf brackets that I found on amazon, which coordinated well with the hits of black I have going on in other parts of the townhouse.
I have installed wall shelves many times, so I went into this project feeling pretty confident in my ability, but shortly into the installation, I thought I was going to burn my townhouse down. I was drilling into the wall where I had marked the location of the stud, only to discover the power went out and I saw a small stream of smoke escaping from the hole I had just drilled. I was telling myself not to panic, but I grabbed my 15-month-old and ran upstairs to tell my husband that I might have set the house on fire. After assessing the situation, my husband and I determined that there was no danger and that I had drilled into electrical wire rather than a stud. Needless to say, should you decide to do a similar project, I highly recommend proper assessment of what is behind your wall before you start drilling.
The countertop was made using the same kind of pine board as the shelves, but I had to do a bit construction to get the size I wanted. I wanted the wood top to hang over the bookcases about an inch and a half so I bought one 1 x 12 x 12 ft pine board and one 1 x 3 x 12 ft pine board. I joined them together using a kreg jig to make pocket holes. I filled any gaps with wood filler, sanded the whole thing down and then sealed with polycrylic. It turned out pretty seamless and was fairly easy to do.
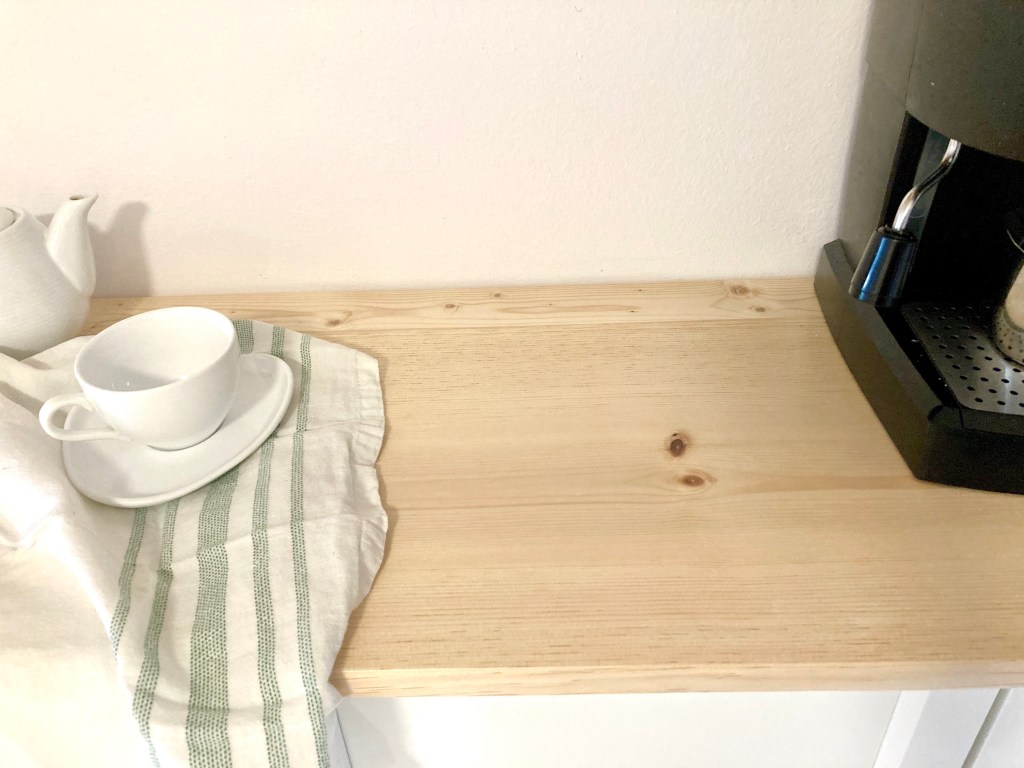
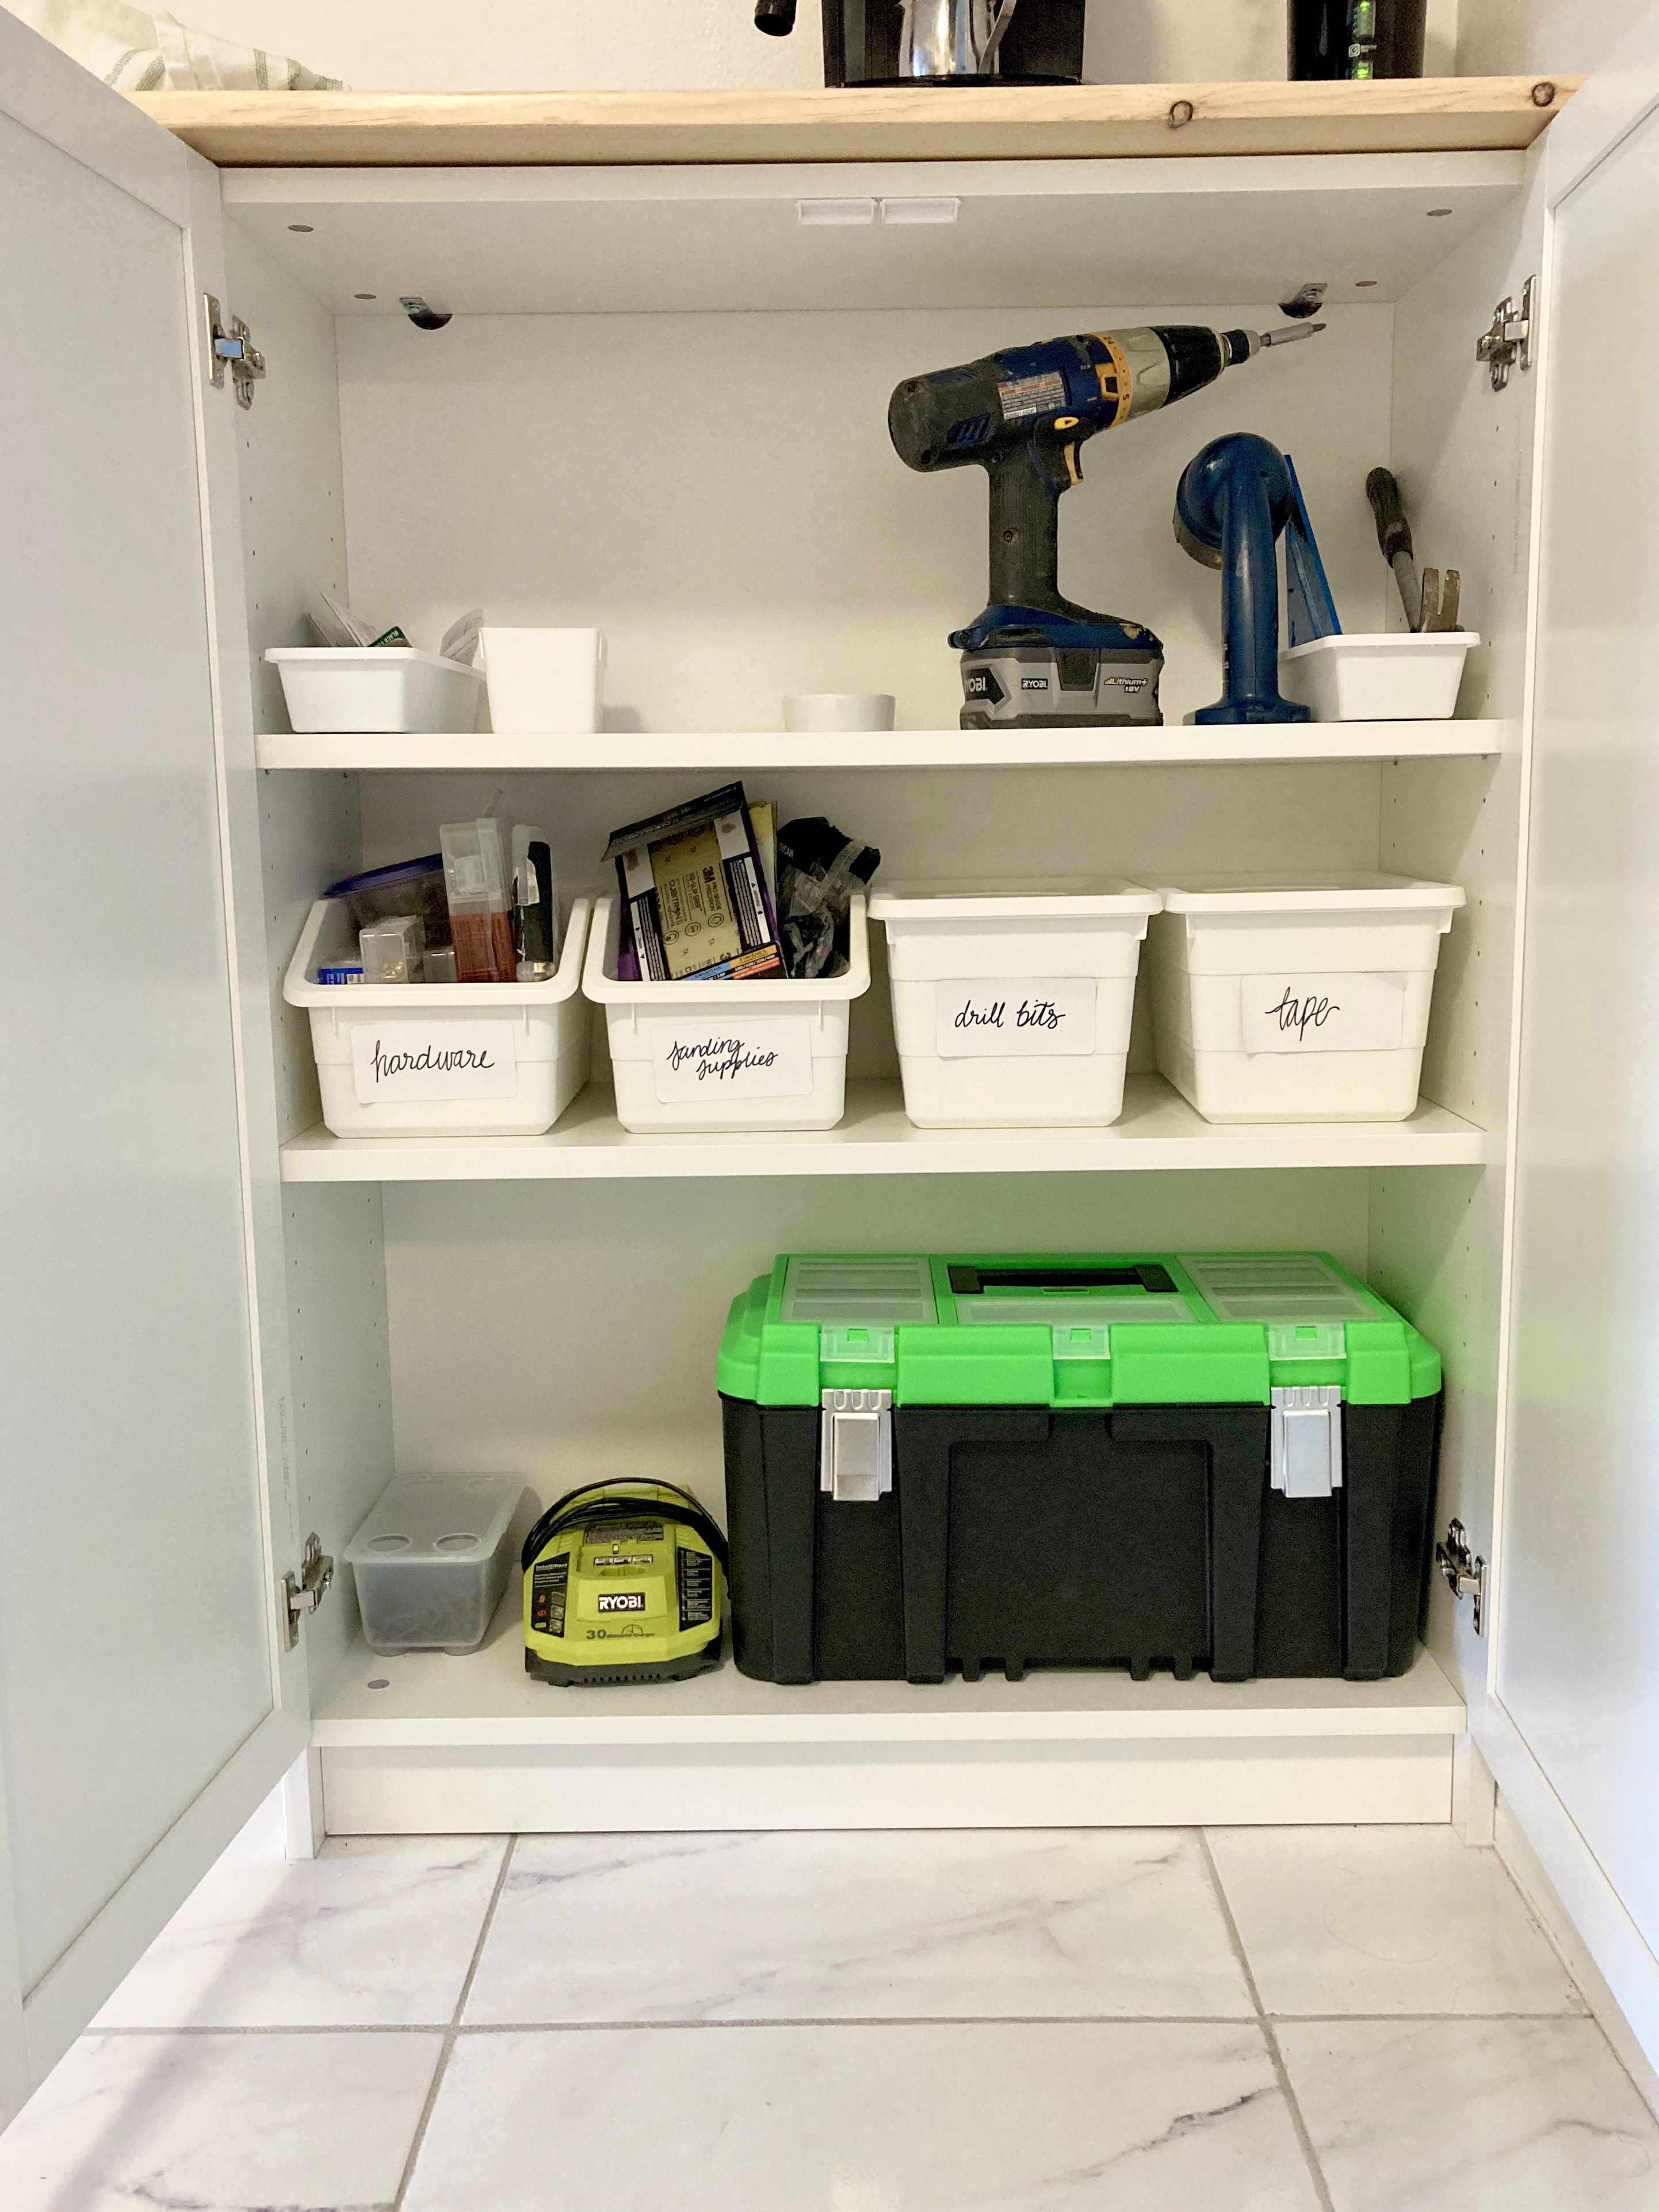
I set the wood countertop on two Billy Bookcases with Oxberg doors from Ikea which were the perfect depth to fit the space. I switched out the knobs for black ones to give it some contrast and coordinate with the brackets. I do feel as though I had to compromise on my ideal vision for the space. I would have much preferred to have the bookcases fill the space completely instead of having the gap in the middle, but I was inches shy of fitting three bookcases across. Not to mention I would have to figure out some kind of workaround with the power outlet.
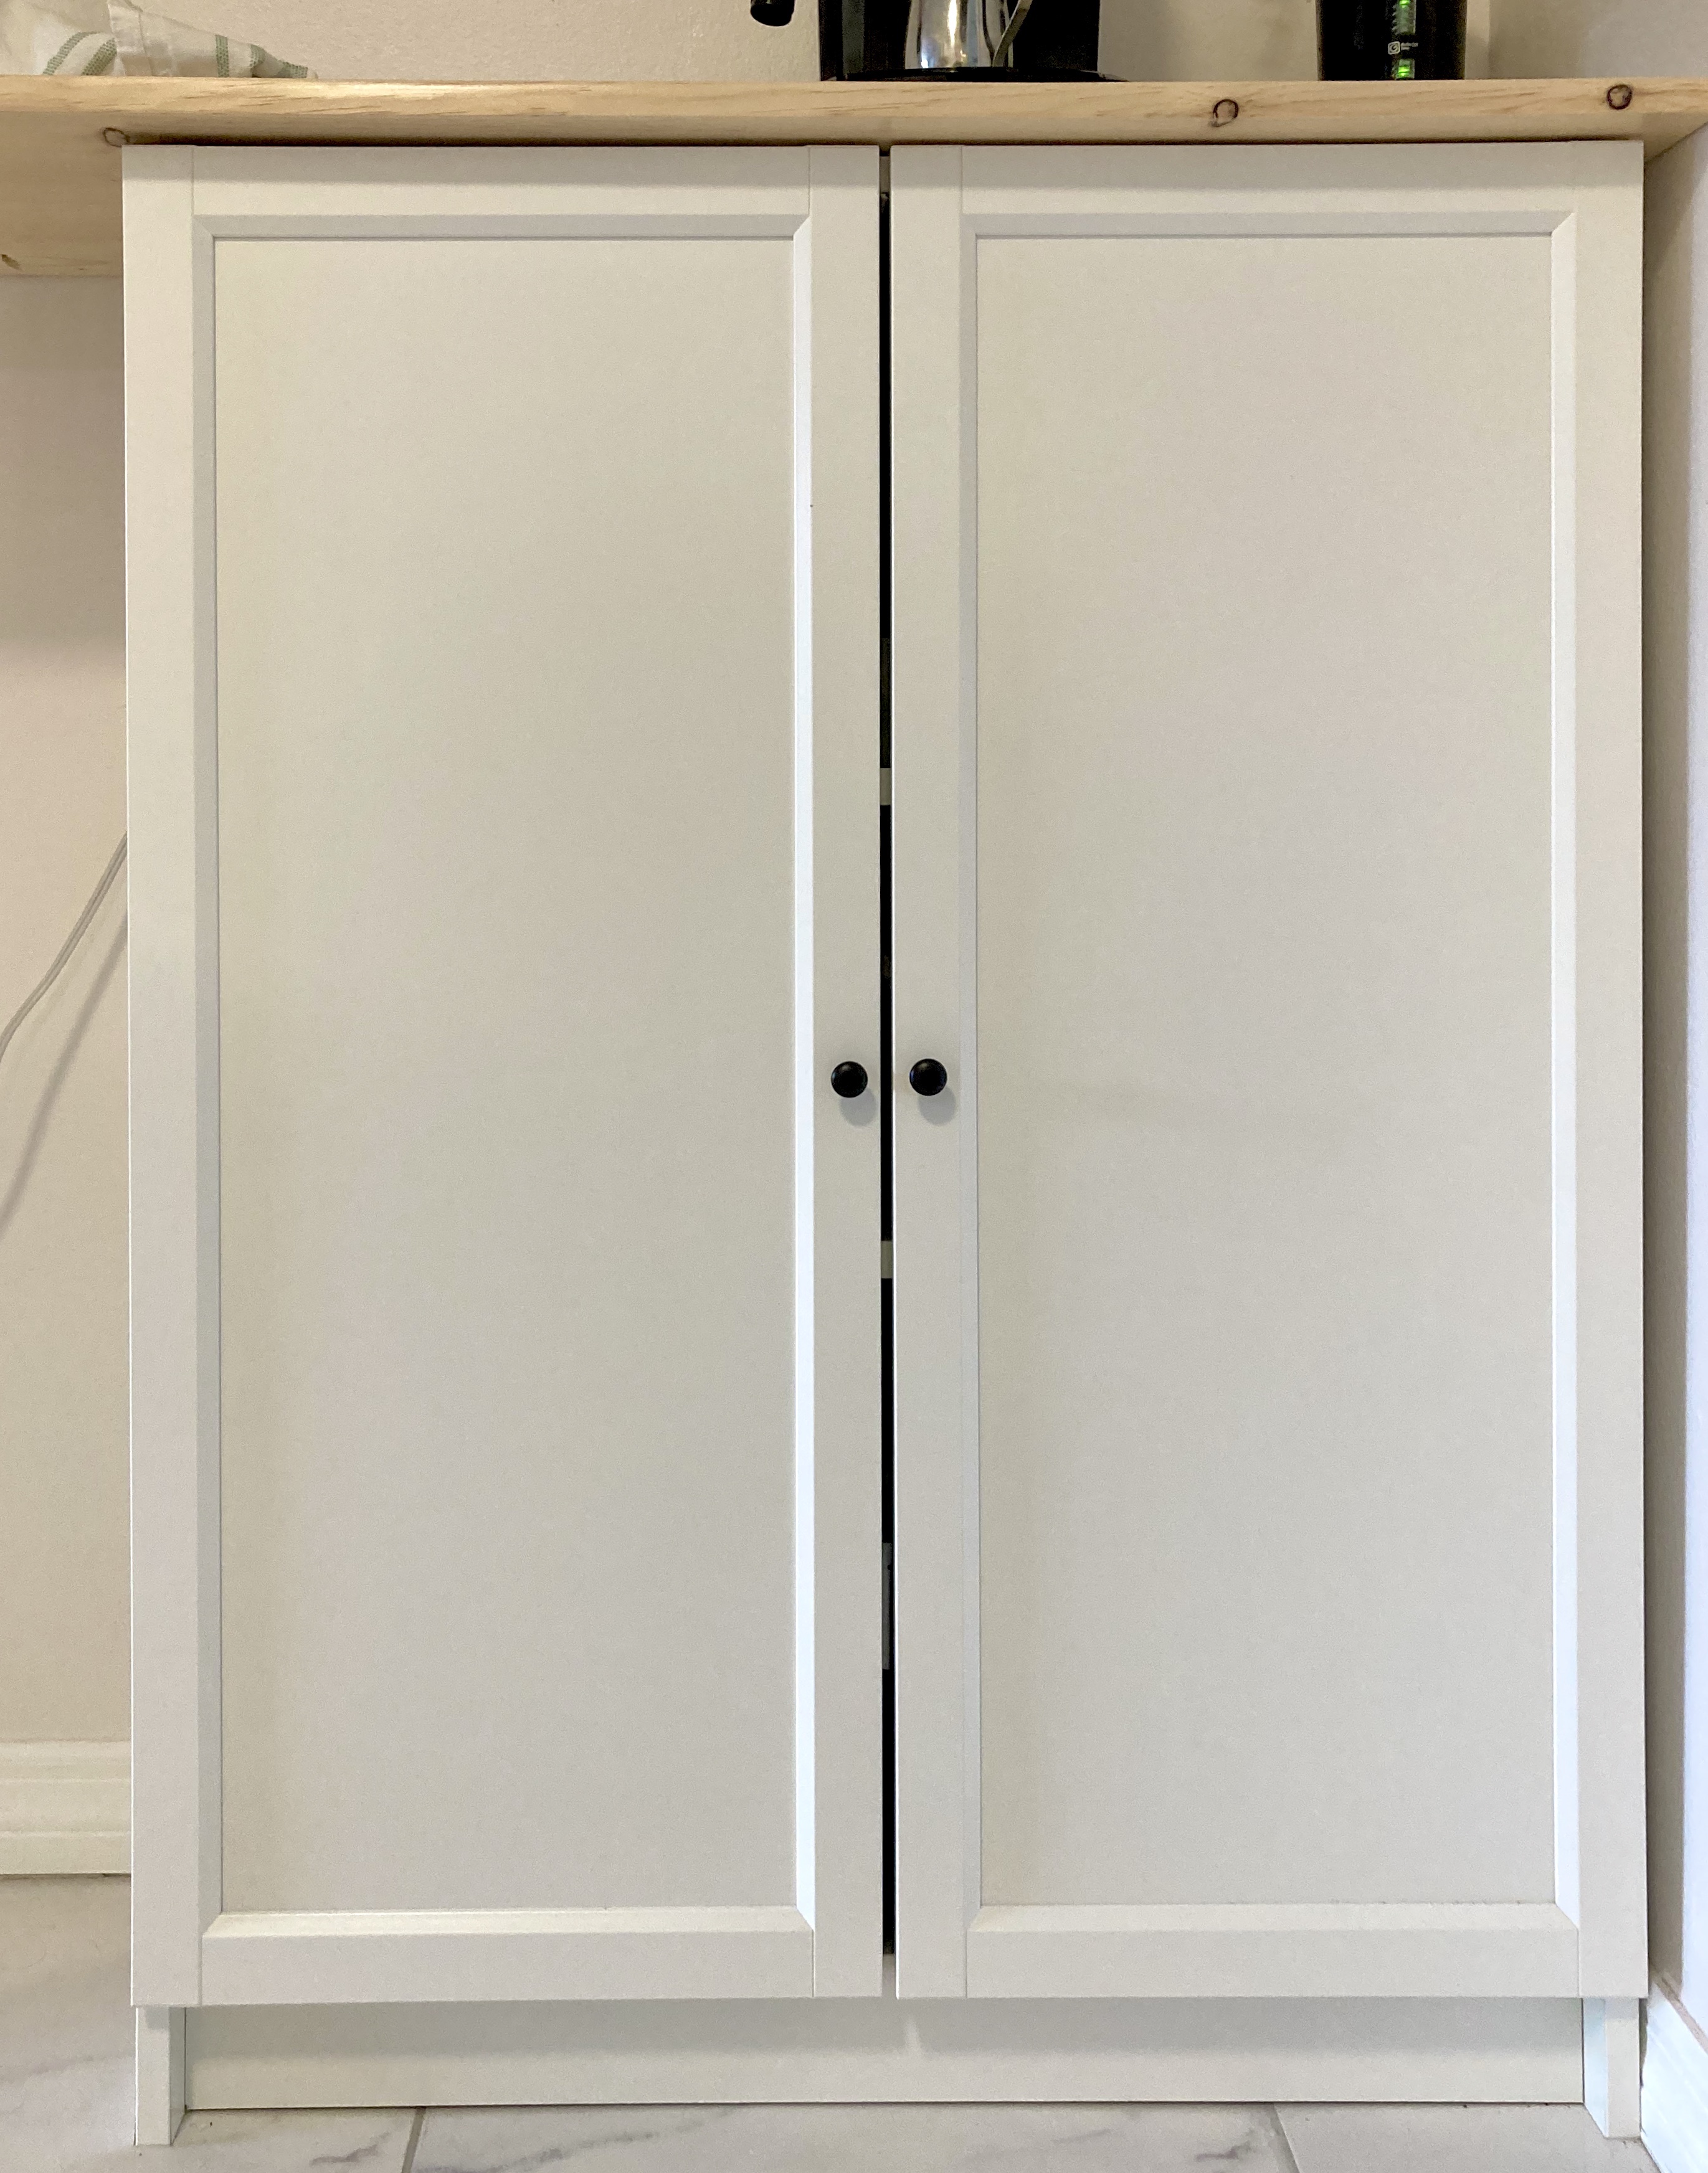
The bookcases are also a bit taller than a standard kitchen counter, so I considered cutting them down to standard height, and then also trimming down the width of one of the bookcases so that I could fit three across. It started to become more and more complex of an idea, and I really wanted to keep this a renter-friendly and easy project, so I settled on keeping it simple with just two bookcases on either end. In the end, the height and gap in the middle bothers me less than I thought it would, and I’m very happy with the result.
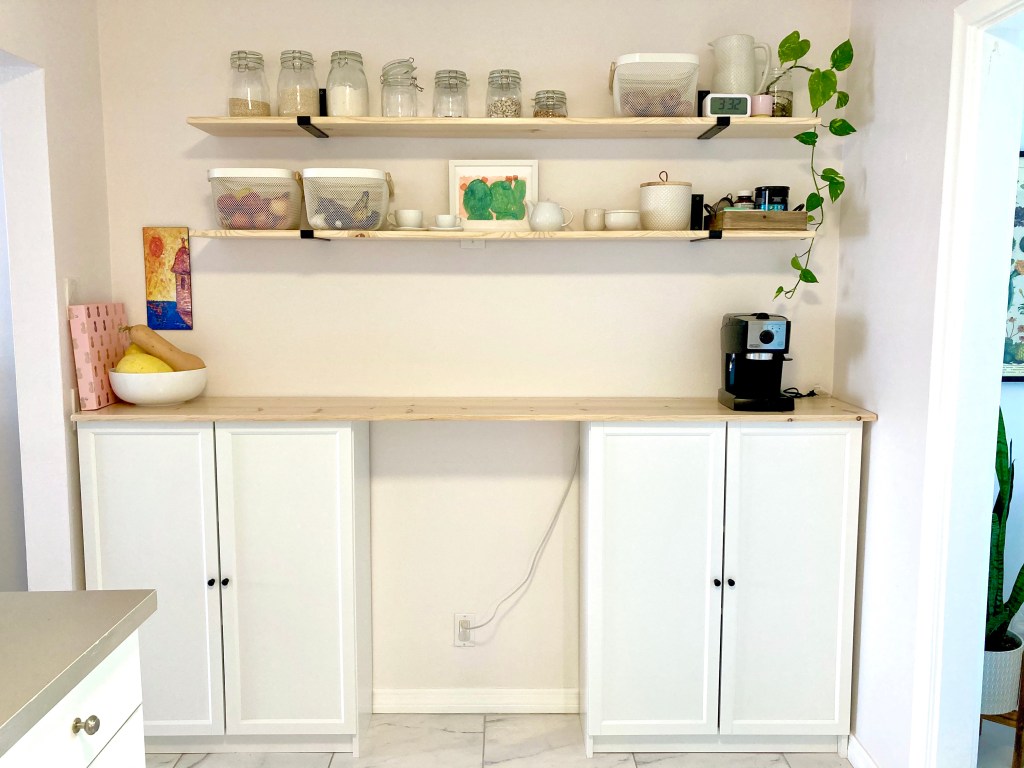
The final touches were adding some baskets for fruits and veggies, some dishes I already own, glass containers for dry goods and my beloved espresso machine. The end result is a bright and airy kitchen pantry and coffee bar, that turned an empty wall into a functional powerhouse of beauty. Now, instead of staring at an empty wall and scratching my head, I breathe a sign of relieve to see my produce have a happy home and I think, “Oh! it must be time for another espresso!”